A perfectly hung banner looks sharp and professional. A droopy, wrinkled one? It undermines your message before anyone even reads it. The difference between an amateur setup and a flawless display comes down to getting the tension just right, picking the correct hardware, and always putting safety first.
Setting the Stage for a Perfect Banner Display
You've invested in a great banner; hanging it correctly is what protects that investment and ensures it gets seen. This guide is all about the real-world strategies that separate a sloppy job from a professional installation. To take it even further, especially at a trade show or corporate function, think about how your banner can work with high-quality event backdrops to create a truly immersive space.
Before you grab a single tool, your first big decision is where the banner will live. This single choice—indoors or outdoors—dictates everything that comes next.

This decision tree helps visualize how that initial choice branches out into specific hardware needs. Of course, the banner itself is a product of a specialized process. If you’re curious about how these massive graphics are made, you can learn all about what is large format printing in our detailed breakdown.
Choosing Your Banner and Hardware for Maximum Durability
A successful banner installation starts long before you ever pick up a drill. It begins with making smart choices about the banner material and the hardware you'll use to hang it. This isn't just about getting the banner up; it's about making sure it stays up and looks good for its entire lifespan.

Match the Material to the Location
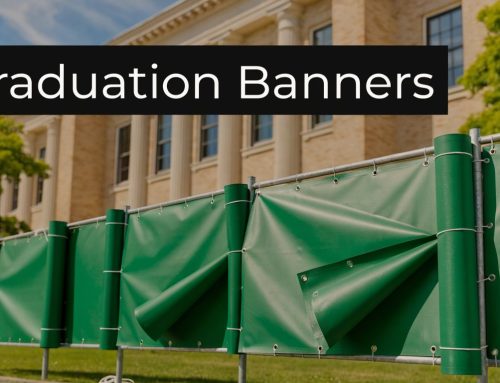
Thinking about where the banner will live is the most critical first step. A banner destined for a windy chain-link fence needs to be mesh vinyl. This material lets air pass right through, preventing the dreaded "sail effect" that can rip grommets clean out. For example, a 3'x10' banner for a construction site fence should always be mesh to withstand constant wind exposure.
On the other hand, a heavy 18oz blockout vinyl is the pro choice for a double-sided pole banner that needs to look sharp from both directions, such as one hanging from a streetlight to announce a city festival. For an indoor backdrop, a lightweight fabric banner offers a high-end, glare-free finish. You can dive deeper into the best material for outdoor signs in our dedicated guide.
The right hardware is just as important. When mounting to a solid wall, for instance, you'll need the right wall mounting brackets to secure your investment properly.
Quality construction matters. We're talking reinforced webbing and correctly spaced grommets—these details separate a banner that lasts from one that fails. In fact, using sturdy grommets and D-rings can slash the risk of tearing in high winds by 50%. A well-hung banner doesn't just survive; it can boost foot traffic by an average of 22%.
Conquering Outdoor Surfaces for a Secure Installation
Taking your banner outside means you're going up against the elements. Wind, rain, and sun are all working to take it down, so a secure installation isn't just a recommendation—it's a necessity. Let's walk through the practical, real-world techniques for hanging banners on the most common outdoor surfaces.

Hanging Banners on Brick and Fences
When you're dealing with brick, the golden rule is to always drill into the mortar joints, never the brick itself. The mortar provides a solid anchor point for concrete screws, and more importantly, it's far easier to patch up later without leaving a permanent scar on the wall. For example, use a hammer drill with a masonry bit to create a pilot hole, then drive in a Tapcon screw with a large washer to spread the load.
For a chain-link fence, the best approach is using zip ties or bungee cords through every single grommet. I can't stress this enough. Skipping grommets creates stress points where the wind can catch and tear the banner right off the fence.
Pro Tip: Always secure the top corners first. This lets you use gravity to your advantage, making it much simpler to pull the banner taut for a clean, wrinkle-free finish that looks professional. For a banner on a fence, attach the top left corner, then the top right, pulling it taut. Next, secure the bottom left, then the bottom right, applying downward tension. Finally, fill in all remaining grommets.
Once you get into large-scale banners over 10×20 feet, you need to think like a pro. Experts often use aircraft-grade cables to eliminate sagging over the long term. It’s a smart move, especially when you consider that poorly hung banners fail 30% more often in windy areas. This kind of professional hardware is becoming more common, part of a growing market for banner hangers you can read more about in this industry report on datainsightsmarket.com.
When in doubt, especially for a huge or high-stakes project, it's always safer to bring in the experts. A commercial sign installation service has the right equipment and experience to guarantee a secure, durable, and safe result.
Mastering Indoor and Trade Show Displays
Hanging a banner indoors is all about precision. You want a polished, professional look without leaving a trail of damaged surfaces behind. If you're working with drywall, always take the extra minute to locate the studs for a rock-solid hold. When that's not an option, make sure you’re using the right anchors for your banner’s weight—the last thing you want is a call about a fallen banner and a hole in the wall. A simple example for a light banner is using self-drilling drywall anchors that can hold up to 50 lbs.
For spaces with drop ceilings, you’ll find that specialized clips that grip the T-bar grid system are your absolute best friend. They make for a fast, clean, and damage-free installation.

Hanging banners from above is a smart move. In high-ceiling venues, overhead systems can boost a banner’s visibility by a whopping 45%. It's no wonder the ceiling banner hanging market has grown into a $1.28 billion industry. The pros secure their work with drop cables every 3-5 feet, often adding swivels to let the banner move with the airflow instead of fighting against it. You can see more on this market's growth over at dataintelo.com.
At a trade show, your banner is part of a bigger picture. Pairing it with other display elements is key to making a real impact. A simple retractable stand is perfect for quick deployment, while a full-size backdrop creates that essential professional atmosphere. Check out our guide on tents for trade shows to see how all the pieces can fit together.
Safety, Permits, and Keeping Your Banner Looking New
Getting a banner up is one thing, but making sure it’s safe, legal, and lasts for years is another game entirely. It’s easy to focus on the hanging and forget the crucial details that prevent problems down the road.
Don't Skip the Basics: Safety First
Let's start with the non-negotiables. Safety has to be top of mind, especially when you're working outside. Always use the right ladder for the job—no overreaching. For any banner big enough to feel awkward, grab a partner. It's not worth the risk. And it sounds obvious, but always, always look up and be aware of overhead power lines before you start.
The Paperwork: Permits and Local Rules
Many cities and towns have specific rules about what you can hang, where, and for how long. It's a classic mistake to install a beautiful banner only to get a notice from the city telling you to take it down. An example would be putting up a "Grand Opening" banner larger than 32 square feet in a city that requires a permit for any temporary sign over that size.
Before you install anything, do a quick check on local ordinances. Some municipalities require permits for signs over a certain size or for specific types of installations. You can find a good overview of what to look for by exploring different sign permit requirements to make sure you’re fully compliant. A little homework now saves a massive headache later.
Protecting Your Investment: Maintenance and Storage
Finally, you need to protect the banner itself. A quality vinyl banner is an investment, and a little care goes a long way.
- Cleaning: Keep it simple. Use only mild soap and water with a soft cloth. Harsh chemical cleaners can strip the finish and fade the print right off the vinyl.
- Inspection: Every so often, give it a quick once-over. Check for any fraying on the hems or stress on the grommets, especially after a windy spell. Catching small issues early prevents big failures.
- Storage: This is the big one. Always roll your banner with the print side facing out—never, ever fold it. Folding creates permanent creases and can crack the ink, ruining it for the next time you need it. A rolled banner stays pristine and ready to go.
Common Questions About Hanging Banners
Even the most straightforward banner installation can leave you scratching your head. Over the years, we’ve heard just about every question in the book, from dealing with surprise gusts of wind to figuring out what to do when a wall is too stubborn for screws.
Here, we’ve gathered the most common questions our team gets from customers. Think of this as your go-to reference for those little on-the-job challenges that pop up when you least expect them.
