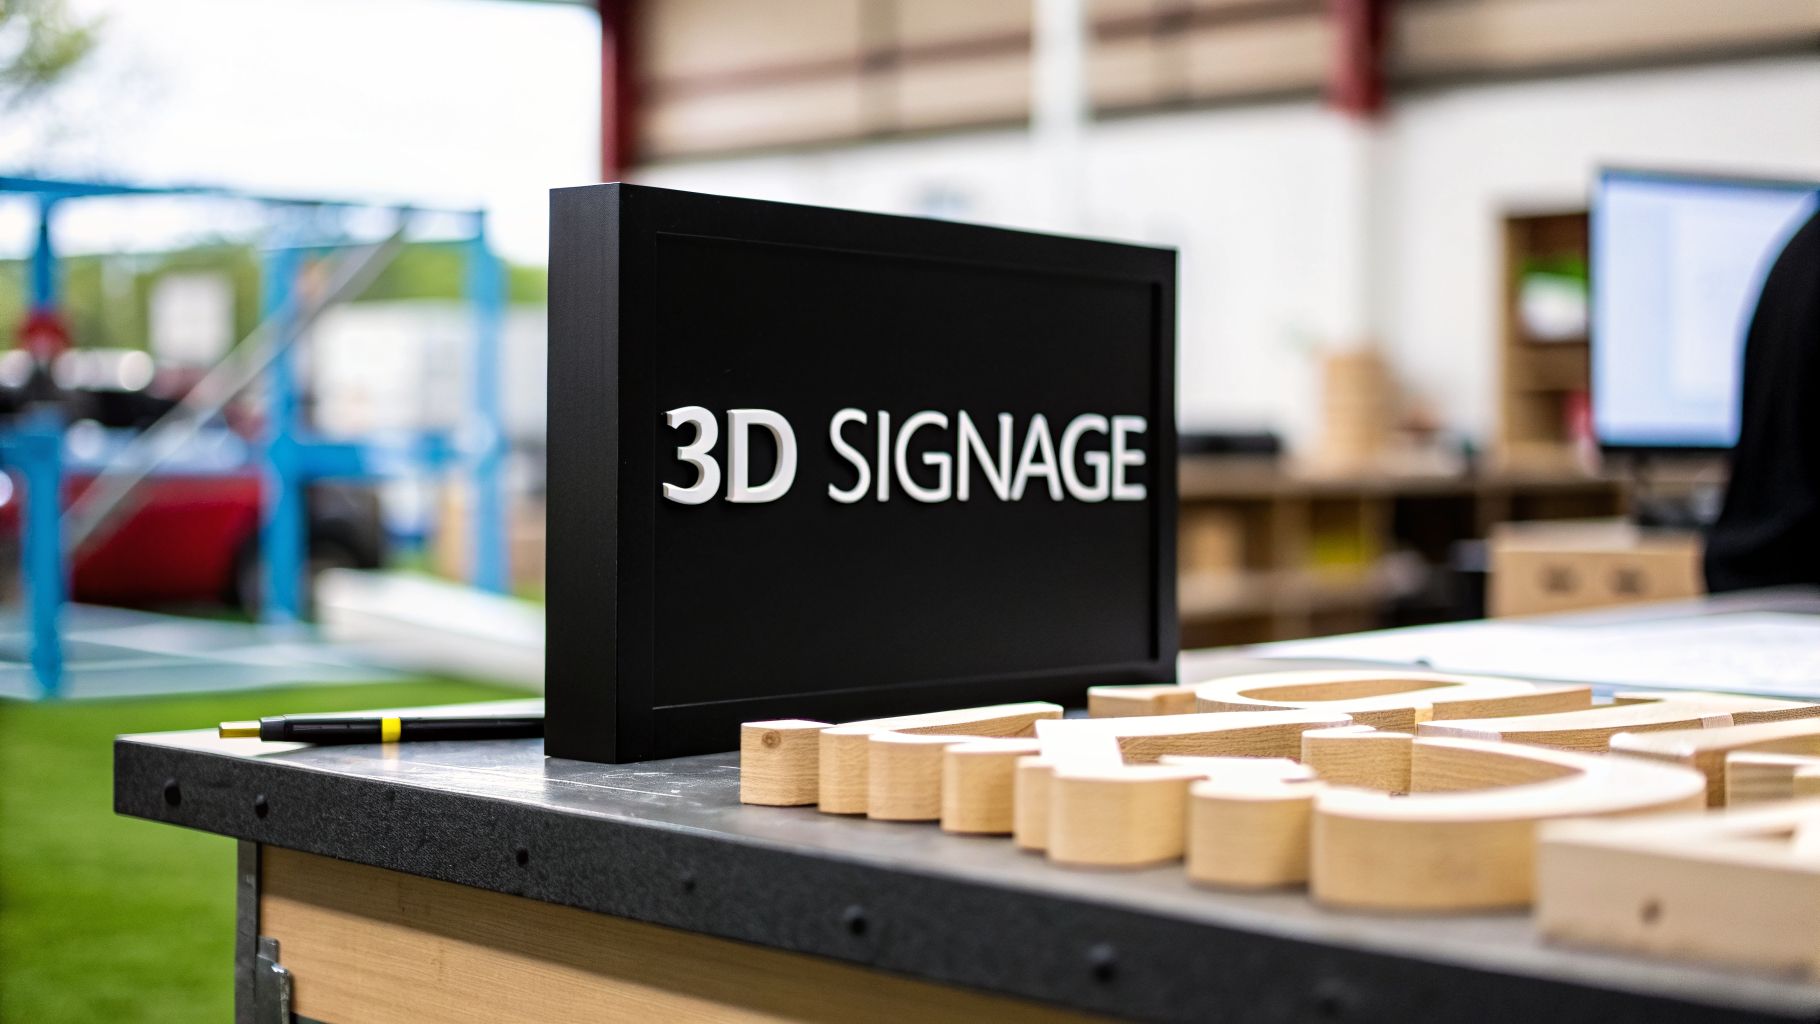
At its core, signage project management is the art and science of taking a sign from a simple idea to a finished, installed reality. It’s about managing all the moving parts—designers, fabricators, city officials, and installers—to make sure the project gets done on time, on budget, and exactly how the client envisioned it.
This disciplined approach is what prevents common headaches like brand inconsistencies or nightmare delays. For example, a project manager ensures the shade of blue on a pylon sign in one city perfectly matches the channel letters on a storefront a thousand miles away, protecting the brand's integrity.
Why Strong Signage Project Management Matters
A great sign is so much more than a marker; it's a 24/7 brand ambassador that pulls in customers and shapes how people see your business. But turning a cool concept into a durable, compliant, and eye-catching sign is a complex job. Without a solid project manager steering the ship, even the best ideas can get shipwrecked by budget overruns, missed deadlines, or a final product that just doesn't hit the mark.
Good project management is the backbone that keeps everything together, turning what could be chaos into a smooth, predictable process.
From Costly Problems to Tangible Benefits
We’ve all heard the horror stories that start with poor planning. In the world of signage, these aren't just hypotheticals—they're real, expensive headaches that pop up all the time:
- Budget Creep: Actionable insight: To avoid this, get a binding quote that includes all potential costs, including equipment rental. For example, a project manager will confirm if a bucket truck is sufficient for a second-story installation or if a more expensive crane is required, preventing a surprise charge on install day.
- Brand Inconsistency: One location gets a sign with a slightly different shade of blue, another uses a different font size. Over time, these small variations dilute your brand's identity. A project manager prevents this by creating a "signage playbook" with exact color codes (e.g., Pantone 286 C) and material specs that all vendors must follow.
- Compliance Delays: You're weeks from your grand opening when you discover the sign violates a local zoning ordinance or a landlord restriction. The project grinds to a halt, messing up your entire launch timeline. A project manager researches these rules upfront, ensuring the design is compliant from day one.
Proper management flips these risks on their head. It means every detail is buttoned up from the start, from the engineering behind a pylon sign to the exact brightness of channel letters. It’s a methodical approach that delivers not just a sign, but a reliable investment. You can see how these principles come into play when selecting the right signage for commercial buildings.
The Growing Complexity of Modern Signage
The signage game is changing. The global digital signage market alone was valued at around USD 28.83 billion in 2024 and is expected to soar to USD 45.94 billion by 2030. This explosion in growth points to one thing: a massive shift toward dynamic, digital displays.
This isn't just about hanging a sign anymore. Project managers now have to juggle sophisticated tech, complex electrical work, and even ongoing software updates.
The diagram below shows how a structured process is the key to navigating this complexity, moving a project from the initial idea to a successful launch.
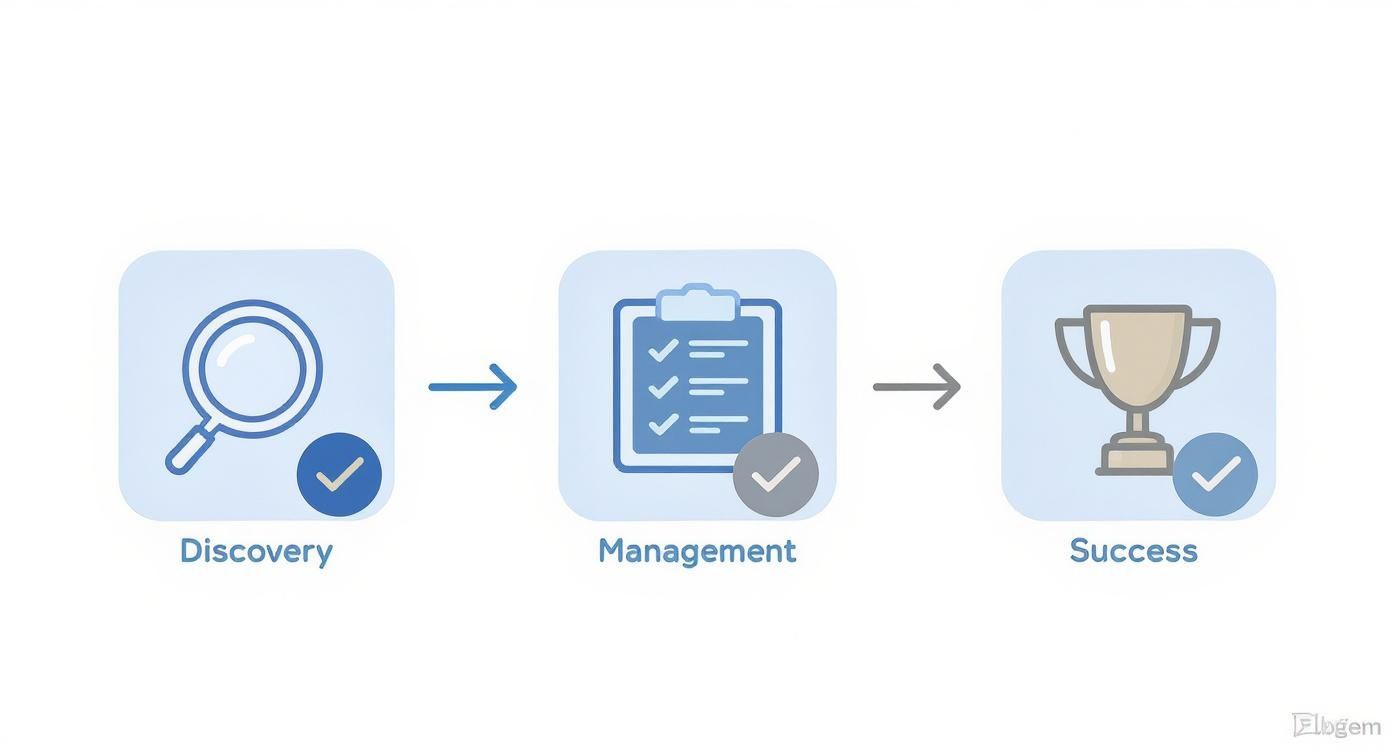
As you can see, a successful outcome isn't an accident. It’s the direct result of careful management that’s built on a rock-solid discovery phase.
Defining Your Project Scope and Budget
Every great sign starts long before the first piece of metal is cut. It begins with a conversation and a solid plan. This is where you map out exactly what you want your sign to accomplish and what you're ready to invest to make it happen. Trying to skip this step is like building a house without a blueprint—you're just asking for expensive mistakes and a final product that doesn't quite hit the mark.
Think of a well-defined scope as your project's North Star. It keeps everyone, from the marketing team to the installation crew, pointed in the same direction. Getting the "what" and "why" nailed down first prevents costly changes and headaches later.
Leading Effective Discovery Sessions
The discovery phase is all about getting the right people in a room and asking the right questions. Bring your key stakeholders to the table—marketing leads, facility managers, brand directors—to set clear, measurable goals. Are you trying to boost foot traffic by 15%? Or maybe the goal is to make sure your new building's exterior matches the recent company rebrand.
Use these meetings to dig into the feeling you want to create. A prestigious law firm will want signage that projects authority and heritage, probably leaning toward materials like brushed metal or stone. On the other hand, a fresh tech startup will likely go for something completely different, like bright, illuminated acrylics and a more dynamic design.
Key Takeaway: Discovery is about turning your brand's personality into physical sign specifications. The more detail you lock in now, the smoother the rest of the project will flow.
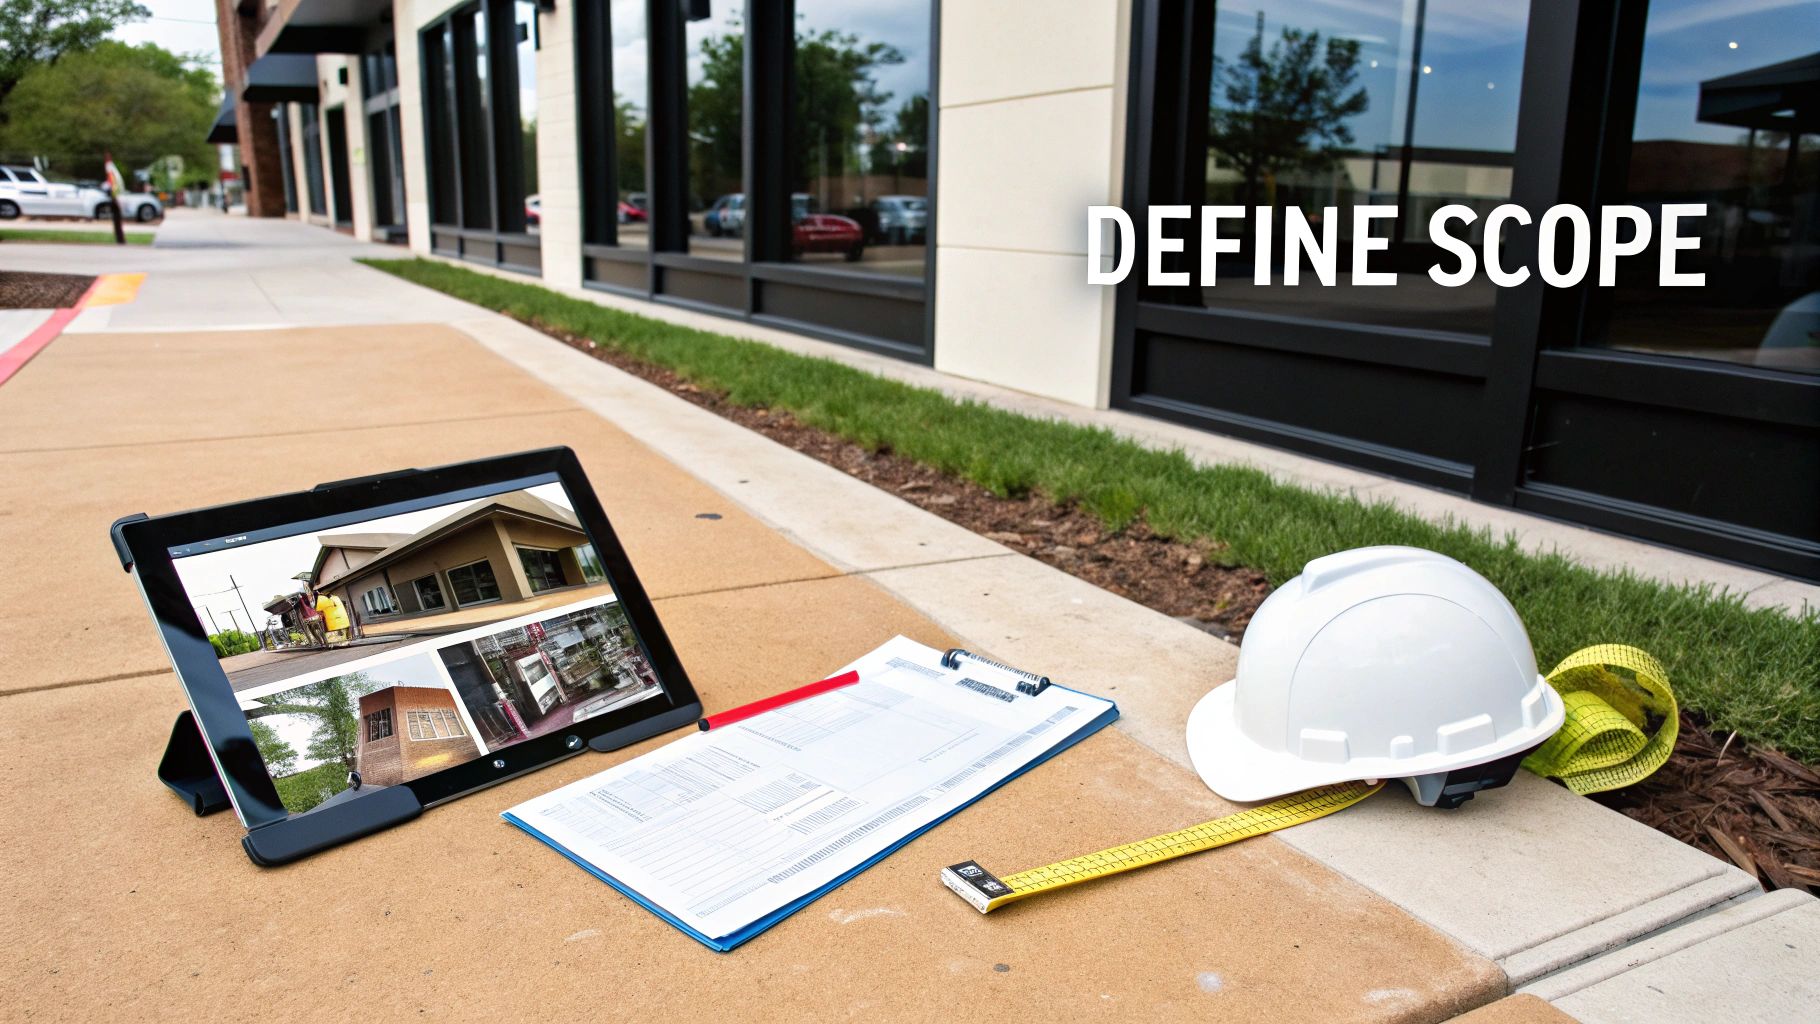
Conducting Thorough Site Surveys
Once you know the what, it's time to figure out the where. A site survey is an absolute must, and it's way more than just measuring a wall. This is your chance to spot potential problems before they become expensive emergencies.
A good site survey checklist is your best friend here.
- Structural Integrity: Get a feel for the facade's condition. Are there cracks in the masonry? Can the wall actually support the weight of that big channel letter sign you have in mind?
- Visibility and Sightlines: Practical example: Walk and drive past the location from all directions. You might discover that a large oak tree completely blocks the view from the busiest intersection, meaning the sign needs to be placed higher than originally planned.
- Environmental Factors: Pay attention to the elements. A sign that faces west gets hammered by the afternoon sun, which can cause colors to fade much faster. Note the direction of prevailing winds, too.
- Access and Utilities: Where are the closest electrical hookups? Can a crane or bucket truck actually get to the installation spot, or are there low-hanging wires or narrow alleyways in the way?
For instance, surveying a retail shop in a historic district might reveal strict rules about lighting and materials. In contrast, surveying a spot for an industrial park sign will be more focused on height limits and making sure it's visible from the highway.
Building a Realistic and Comprehensive Budget
With a clear scope and a detailed site survey, you can finally build a budget that won't have any nasty surprises. A rookie mistake is to only budget for the sign itself. A professional budget, however, covers the entire journey from concept to installation and beyond.
The sign industry often operates on tight margins, so accurate budgeting is everything. Recent data shows that while around 28% of sign companies enjoy healthy profit margins of 20-30%, a larger chunk (39%) are working within the 10-20% range. As detailed in the 2025 State of the Sign Industry report, this makes precise cost management crucial for everyone involved.
Here's what your budget needs to account for:
| Budget Component | Description | Why It's Important |
|---|---|---|
| Design & Engineering | Fees for initial concepts, mockups, and any structural plans required. | Guarantees the sign is both good-looking and built to last. |
| Permitting | All city and municipal fees for submitting applications and getting approvals. | Keeps you out of legal trouble and avoids project-killing delays. |
| Materials & Fabrication | The cost of raw materials and the shop labor to construct the sign. | This is the core cost of the physical sign itself. |
| Installation | Labor, equipment rentals like cranes, and any necessary electrical work. | Covers the complex job of getting the sign safely and securely mounted. |
| Contingency Fund | An extra 10-15% of the total budget set aside for the unexpected. | This is your safety net for surprises, like finding damaged wiring in a wall. |
Striking the right balance between cost and quality is always the goal. For example, you can often get a high-end look without the premium price tag. Exploring your options in our guide to choosing the right sign board material can help you compare alternatives like aluminum composite panels versus solid aluminum, finding the sweet spot for your budget and durability needs.
Navigating Design and Regulatory Hurdles
Once you’ve nailed down the scope of your project, you'll enter a phase where creative vision smacks right into hard reality. This is where you have to balance the dream of a stunning sign with the practicalities of getting it built, installed, and legally approved. This is also where a sharp project manager truly earns their keep, turning what could be a battlefield into a smooth, coordinated effort.
The key is to steer the design conversation toward what’s actually buildable from the very beginning. A wild design with intricate, flowing curves and bespoke lighting might look incredible in a 3D render, but can it be made on budget? A great project manager acts as the translator between the designer’s concept and the fabricator’s real-world capabilities, saving everyone from the headache of costly redesigns later.
Balancing Aesthetics with Practicality
I've seen it a hundred times: a client falls head-over-heels for a design that completely ignores the physical world. For instance, a designer drafts a super sleek, thin-profile sign for a beautiful old brick building. But the project manager, who has the site survey in hand, knows that the crumbly facade needs a much beefier mounting system—something the paper-thin design can't possibly support.
This is where you have to get everyone talking. The manager's job is to sit the designer and fabricator down to find a solution. Maybe you add a subtle backing plate to distribute the weight or thicken the sign's profile just enough. It becomes a collaborative negotiation that honors the original vision while ensuring the sign stays securely on the wall for years to come.
And if you’re working with digital signage, you need to understand the tech that powers it. This isn't just about the screen; it's about knowing the specs for things like Power over Ethernet (PoE) technology, which impacts everything from the sign's physical build to its electrical hookups.
Mastering the Permit Maze
If there’s one thing that will derail a signage project faster than anything else, it's the permitting process. Seriously. Untangling the mess of local zoning laws, city codes, and landlord rules is a job in itself. Treating permits as an afterthought is the most expensive mistake you can make.
Every town, city, and county has its own quirky set of rules. One municipality might limit your sign’s height based on the street's width, while the town next door has strict rules about brightness to prevent light pollution. A project manager's first job is to become a temporary expert on these hyper-local ordinances.
This isn't just a quick Google search. It means digging deep and getting answers.
- Zoning Ordinances: What type of sign—monument, pylon, wall-mounted—is even allowed in that commercial zone?
- Landlord Requirements: What does the lease or property covenant say? I've seen entire projects torpedoed by a clause restricting sign colors or materials.
- Code Compliance: Does the sign meet all the necessary building codes, including ADA standards for things like tactile and braille elements?
Key Takeaway: The moment you have a preliminary design, start the permit research. Designing a sign that’s compliant from the get-go saves you from the gut-wrenching pain of going back to the drawing board after it’s already been built.
Proactive Permit and Compliance Strategy
You absolutely cannot wait until a sign is fabricated to apply for a permit. That's a rookie move and a recipe for disaster. If you do, you risk your beautiful new sign sitting in a warehouse collecting dust for weeks—or even months—while you argue with city planners.
A smart project management plan involves getting that permit application package submitted as early as humanly possible. And it's not just a simple form. It's a full-blown presentation designed to make it incredibly easy for the city official to say "yes."
A bulletproof permit application usually includes:
- Detailed Drawings: Scaled renderings showing every dimension, material, and color.
- Site Plan: A clear map showing the property, the building, and precisely where the sign will be installed.
- Structural Engineering: If needed, the official calculations and plans that prove the sign and its mounting are safe.
- Landlord Approval: A signed, official letter from the property owner giving their blessing.
Just as important is managing the communication. Follow up with the permitting office, answer their questions immediately, and build a good rapport with the officials. Every location is different, and you can learn more about the specific sign permit requirements that can make or break your timeline. Staying on top of this process is what keeps minor paperwork issues from turning into major project killers.
Overseeing Fabrication and Installation
This is where the rubber meets the road. All the blueprints, renderings, and late-night planning sessions finally come to life as a physical asset for your client's brand. Managing the fabrication and installation phases is all about razor-sharp communication, obsessive quality control, and airtight logistics. Get this right, and the sign that goes up is the exact sign the client fell in love with.
The handoff from design to fabrication has to be seamless. You can't just email a JPEG and hope for the best. The fabricator needs a complete, detailed package: material specs, precise color codes, structural drawings—the works. Your job is to be the single source of truth, eliminating any chance of misinterpretation that leads to expensive mistakes.
Maintaining Quality During Fabrication
A sign’s journey from raw materials to a finished product has several critical checkpoints. Just waiting for a final inspection is a rookie mistake that can cost you dearly. Instead, you need to be proactive, catching small issues before they become big problems. For example, knowing the ins and outs of making metal signs helps you ask intelligent questions about welds, finishes, and long-term durability.
Think of a quality control checklist as your best friend during this stage. It's not a bureaucratic step; it's your defense against flaws.
- Material Verification: Did the right grade of aluminum or acrylic show up? A simple mismatch here can drastically shorten the sign's lifespan.
- Color Matching: Actionable insight: Don't just rely on screen colors. Request a physical paint or vinyl sample from the fabricator to approve under natural light before they produce the full sign.
- Structural Integrity: For larger signs, you absolutely must inspect welds and connection points to ensure they meet the engineered specs. This isn't just about quality; it's about safety.
- Electrical Component Testing: If the sign lights up, test every LED, power supply, and wire before it leaves the shop. Trust me, troubleshooting electrical issues on-site is a nightmare of delays and added costs.
The American sign industry is packed with competition. With the number of businesses swelling to nearly 39,645 in 2025, fabricators are under pressure. Your commitment to high-quality standards isn't just good practice—it's what makes your projects stand out and builds a reputation for excellence.
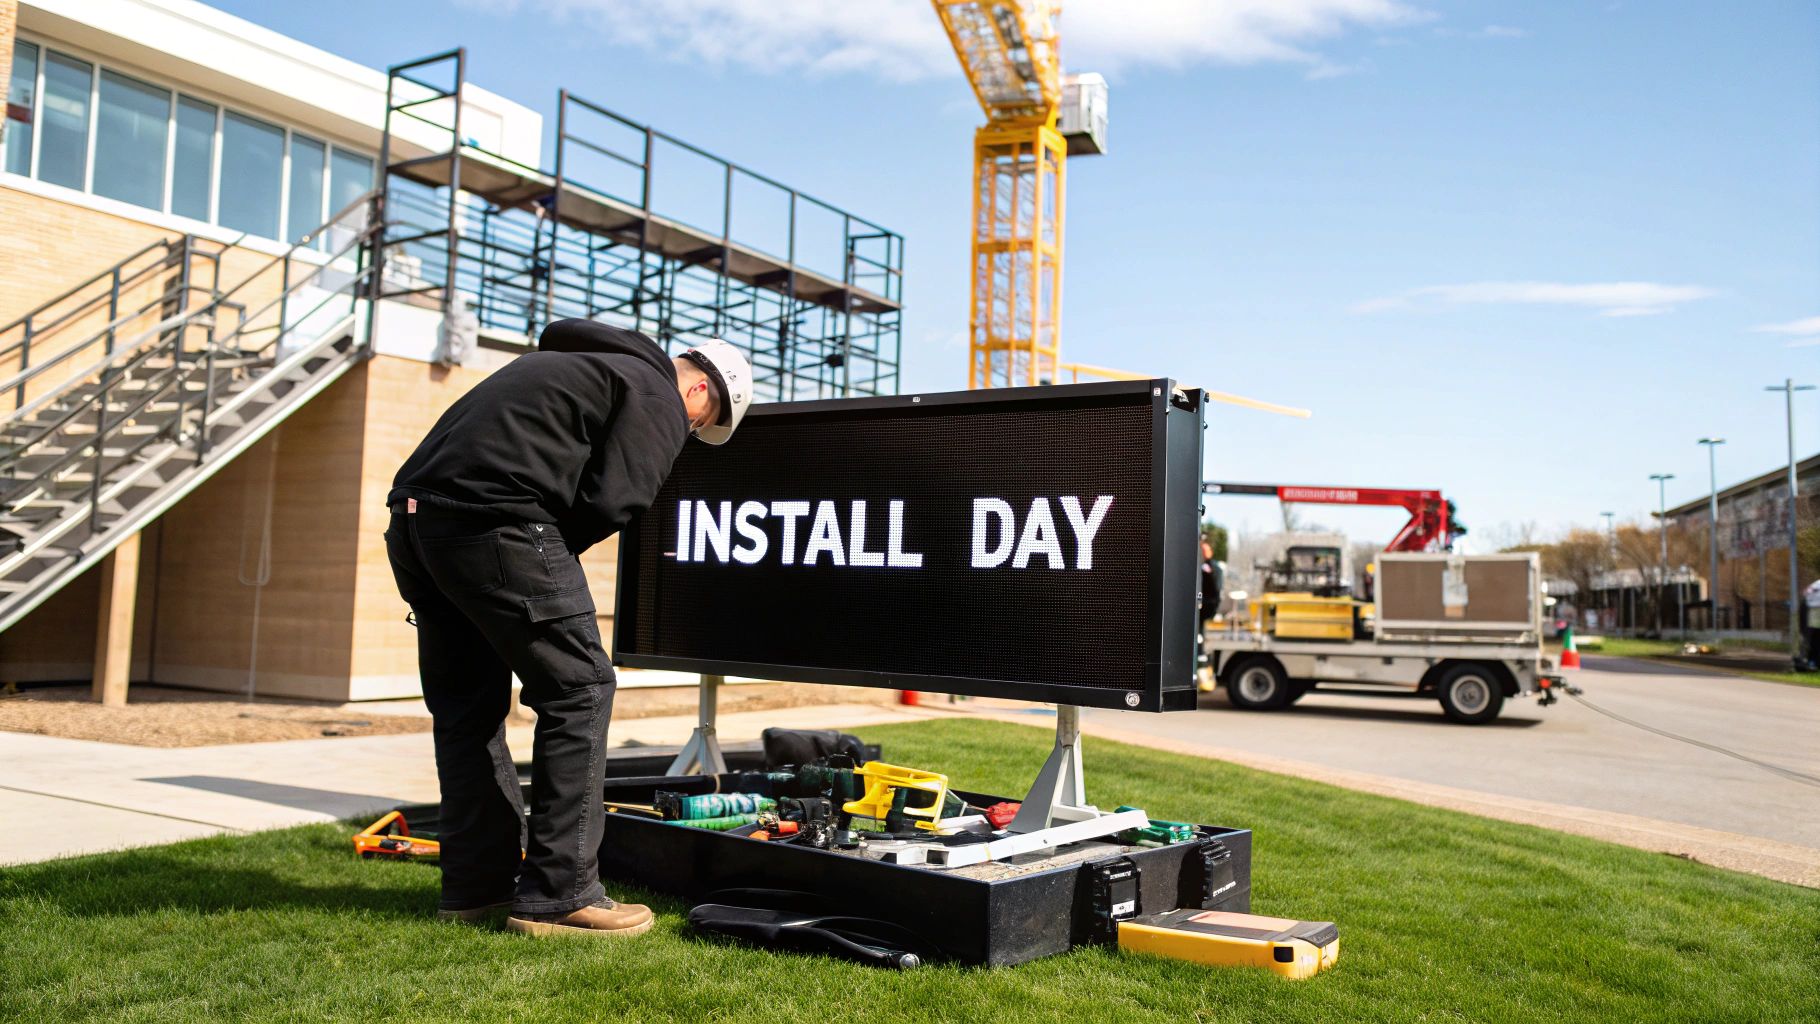
Mastering Installation Logistics
Once the sign is built and has passed your quality checks, the focus shifts to the grand finale: installation. This is where your logistical skills are truly tested. A smooth install day doesn't happen by accident; it's the direct result of meticulous, behind-the-scenes prep work.
Coordination is everything. You're juggling the schedules of the installation crew, the client's on-site contact, electricians, and maybe even crane operators. A detailed, hour-by-hour timeline for the day of install is non-negotiable and should be shared with everyone involved.
Pro Tip: Always, always have a Plan B. What's the protocol if a storm rolls in? What if a delivery truck is blocking your access point? Thinking through these potential curveballs ahead of time means you can pivot quickly without derailing the entire day.
To keep things on track, a solid checklist is essential. Here's a simple framework to make sure nothing falls through the cracks on the big day.
Signage Installation Day Checklist
| Task Category | Key Action Items | Status (To-Do / In Progress / Complete) |
|---|---|---|
| Pre-Installation | Confirm site access with property manager. | |
| Verify all permits are on-site and visible. | ||
| Final weather check and contingency plan review. | ||
| Site Preparation | Cordon off the installation area for safety. | |
| Confirm power access for tools and testing. | ||
| Protect surrounding landscape and property. | ||
| During Installation | Conduct pre-lift safety briefing with the crew. | |
| Verify mounting points against plans. | ||
| Test electrical connections once installed. | ||
| Post-Installation | Final quality inspection and photo documentation. | |
| Thoroughly clean the site of all debris. | ||
| Secure client sign-off on the completed work. |
This checklist isn't just about ticking boxes; it's about ensuring a safe, efficient, and professional conclusion to the project that leaves a lasting positive impression on your client.
Navigating On-Site Installation Challenges
Let's be real: perfect installations are rare. The true test of a great project manager is how they handle the inevitable surprises.
Imagine this scenario: the crew arrives to mount a heavy channel letter sign on a brick wall, but they find the brick is far more brittle than the initial site survey indicated.
- The Problem: The standard mounting hardware won't work. Forcing it could crack the facade or, worse, fail to hold the sign securely over time.
- The Solution: Because you anticipated this risk, you already have an alternative plan. You immediately call the on-site lead, brief the client on the situation, and authorize the use of a custom backing plate that will distribute the weight safely.
By anticipating problems and having solutions ready, you turn a potential catastrophe into a minor, professionally handled adjustment. This is what keeps clients happy and projects ending on a high note.
Finalizing the Project and Client Handoff
This is where you cement your reputation. Getting the sign installed perfectly is one thing, but a smooth, professional handoff is what turns a one-off job into a long-term partnership. It’s your final chance to prove your attention to detail and give the client total confidence in their new investment.
It all starts with one last, careful walkthrough. This isn't just a quick look from the car; you need to get up close with the client and inspect every detail. If the sign is illuminated, you absolutely must see it in action at night as well as during the day to catch any issues.
Conducting the Final Walkthrough
Think of this final check as seeing the project through your client’s eyes for the first time. You’re hunting for any tiny imperfection that could take away from that "wow" moment. In the professional world, we call this creating a punch list—a simple document that tracks any last-minute fixes.
Your punch list should hit a few key areas:
- Flawless Finish: Look for any scratches, scuffs, or paint chips that might have happened during shipping or installation.
- Structural Security: Give it a gentle push. The sign should be rock-solid, perfectly level, and securely fastened with no wobble.
- Even Illumination: When you flip the switch, the light should be consistent. No dim spots, no flickering, just a clean, even glow across the board.
- Site Cleanliness: The job isn't done until the site is spotless. All packaging, old signage, and debris should be gone, leaving the area looking better than when you arrived.
Imagine you're wrapping up a new retail storefront sign. During the night-time walkthrough, you spot a single LED in a channel letter that’s just a fraction dimmer than the rest. Adding it to the punch list and scheduling an immediate swap—before the client even has to ask—shows you’re on top of your game.
Assembling a Comprehensive Handoff Package
Once the punch list is clear and the client is thrilled, it's time to hand over the keys. Just sending the final bill is a huge missed opportunity. A professional handoff package empowers the client and positions you as a trusted expert, not just a vendor.
Your goal is to leave the client with zero questions about what comes next. A thorough handoff package provides them with everything they need to protect their investment and demonstrates your commitment to their long-term success.
This isn’t just a pile of papers; it should be an organized, easy-to-use "owner's manual" for their new sign. It’s the final professional touch on a job well done.
Make sure your package always includes these four things:
- Warranty Information: Give them clear copies of all warranties—for the LEDs, the power supplies, and your own guarantee on the fabrication and installation. Be sure to highlight expiration dates and how to make a claim.
- Maintenance and Cleaning Guide: Get specific. Don’t just say "clean the sign." Tell them exactly what non-abrasive cleaner to use on the acrylic faces and how often to wipe it down to keep it looking sharp.
- As-Built Documents: This includes final photos of the installation from multiple angles, plus copies of the signed-off permits and final engineering drawings.
- Future Service Contacts: Make it easy for them to call you again. Provide a direct name and number for any future maintenance, repairs, or their next project.
This last step doesn’t just close out the project; it opens the door for future business and proves you’re a partner they can count on long after your crew has driven away.
Managing Complex Multi-Site Rollouts
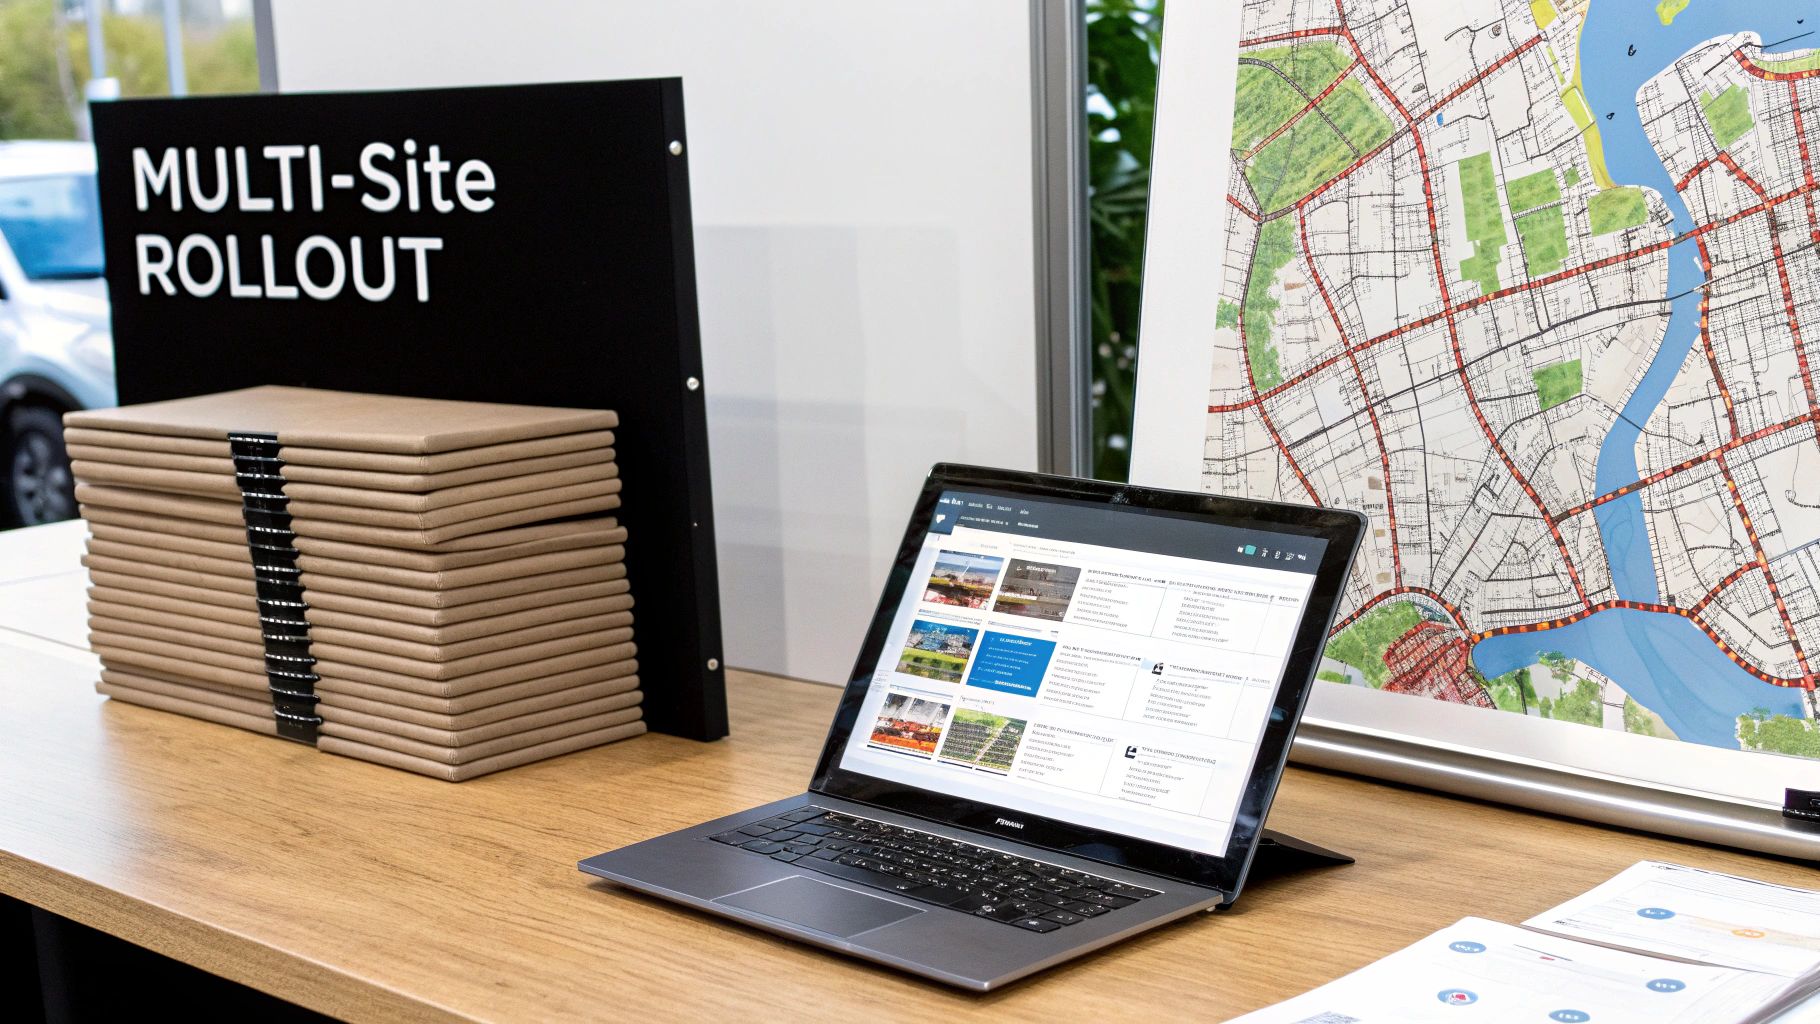
Installing one sign is a project. Rolling out new branding across dozens or even hundreds of locations? That's a completely different beast. This is where big-picture strategy meets on-the-ground execution, and it demands a centralized plan to keep your brand looking sharp everywhere.
Without that master plan, you end up with a mess—a patchwork of slightly different signs that chip away at your brand identity. The secret to success lies in standardization. This means building a master sign program, which is essentially a brand playbook. It details everything from approved color codes and materials to exact font usage, becoming the bible for every fabricator and installer involved.
Building Scalable Systems
To pull this off without losing your mind, you need systems that can be copied and pasted across every single location. Standardized site survey templates are a perfect example. Instead of someone winging it at each property, a consistent template guarantees that every surveyor is capturing the same vital information, from facade measurements to where the electrical hookups are.
Another lifesaver is a phased rollout plan. Trying to install 100 signs at once is a recipe for pure chaos. A better approach is to group locations by region or priority. This lets you focus your resources, manage your sign inventory, and keep a close eye on quality in manageable waves.
A strong multi-site strategy hinges on creating a central communication hub. A single project manager must coordinate between corporate stakeholders, regional managers, dozens of landlords, and a network of local installers to prevent miscommunications that can derail schedules.
Vendor Management and Quality Control
When you're rolling out signs across the country, your brand's reputation in a new city often rests in the hands of a local installation crew you've never met. This makes meticulous vendor management absolutely critical. The goal is to build a reliable network of certified partners who get your brand standards and understand the specific code requirements in their backyard.
For a nationwide rollout of illuminated signs, for example, you have to find trustworthy partners in each market. Your search to identify the best local channel letter sign companies near me is a crucial first step in building out that network. Vetting these partners thoroughly is the only way to ensure consistent quality from one coast to the other.
Keeping everyone on the same page relies on a few simple but powerful processes:
- Detailed Documentation: Every single installer gets the exact same installation guides and brand standards manual. No exceptions.
- Photo Verification: Before you release that final payment, require high-resolution photos of the completed installation. This simple step is a powerful check for proper placement and quality.
- Consistent Feedback: Create a system for rating vendor performance. This helps you figure out who your go-to partners are and who needs to be phased out.
This disciplined approach is what turns a logistical nightmare into a seamless brand implementation, ensuring your logo looks just as impressive in Denver as it does in Atlanta.
Common Signage Project Questions
Getting into the nitty-gritty of a signage project for the first time always brings up some important questions. Getting these answers sorted out early can save you a world of headaches, budget surprises, and delays down the line. Let's tackle some of the most common hurdles right now.
What Is the Biggest Mistake in Signage Project Management?
Hands down, the single most costly mistake is treating permits and compliance like an afterthought. I've seen countless projects get bogged down for weeks—sometimes months—all because someone assumed the permitting process would be quick and easy.
You can have the most beautiful design and a flawless fabrication plan, but if you haven't done your homework on local zoning laws or landlord requirements, you're heading for a complete standstill. A seasoned project manager knows to front-load this research, getting all the necessary approvals locked in before a single piece of metal is cut.
The single biggest risk to any signage project timeline is assuming the permit will be a quick approval. Proactive research and early submission are non-negotiable for success.
How Do I Create a Realistic Budget for a Signage Project?
A true budget goes way beyond just the price tag on the sign itself. Think of it more like an ecosystem of costs. You have to account for design fees, the initial site survey, all the permit application fees, and potentially engineering costs if the sign is complex.
Then, of course, you have the core costs: materials, fabrication, shipping, and the labor for installation. Don't forget equipment rentals—that crane or bucket truck isn't free—and any necessary electrical work to power it up.
Here’s the most important tip: always add a contingency fund of 10-15%. This is your safety net for the unexpected. Maybe the crew discovers a structural issue hidden in the wall during installation that needs extra reinforcement. That contingency fund is what keeps a minor hiccup from turning into a major budget crisis.
Who Is Responsible for Sign Maintenance After Installation?
This should always be clearly spelled out in the project contract before you sign anything. Once the sign is installed and the client signs off, the project manager's job is to deliver a complete handoff package.
This package is critical. It should include all warranty documents from the manufacturers, a recommended cleaning and inspection schedule, and specific instructions for care. While the day-to-day upkeep falls to the client, a good sign company will often offer an optional maintenance contract. These contracts typically cover things like annual inspections, professional cleaning, and any future repairs, making life much easier for the business owner.
Ready to take the guesswork out of your next signage project? The team at On Display Signs, Inc. provides end-to-end management, from design and permitting to fabrication and installation, ensuring your brand stands out for all the right reasons. Learn more about our seamless signage solutions.


