Think of banner grommets as the reinforced eyelets on a pair of heavy-duty work boots. They’re the small metal or plastic rings pressed into a banner's edge, creating secure anchor points for hanging. Without them, even a simple rope or zip tie would quickly shred the banner material, leaving your message in a tattered heap on the ground.
What Are Grommets for Banners and Why You Need Them
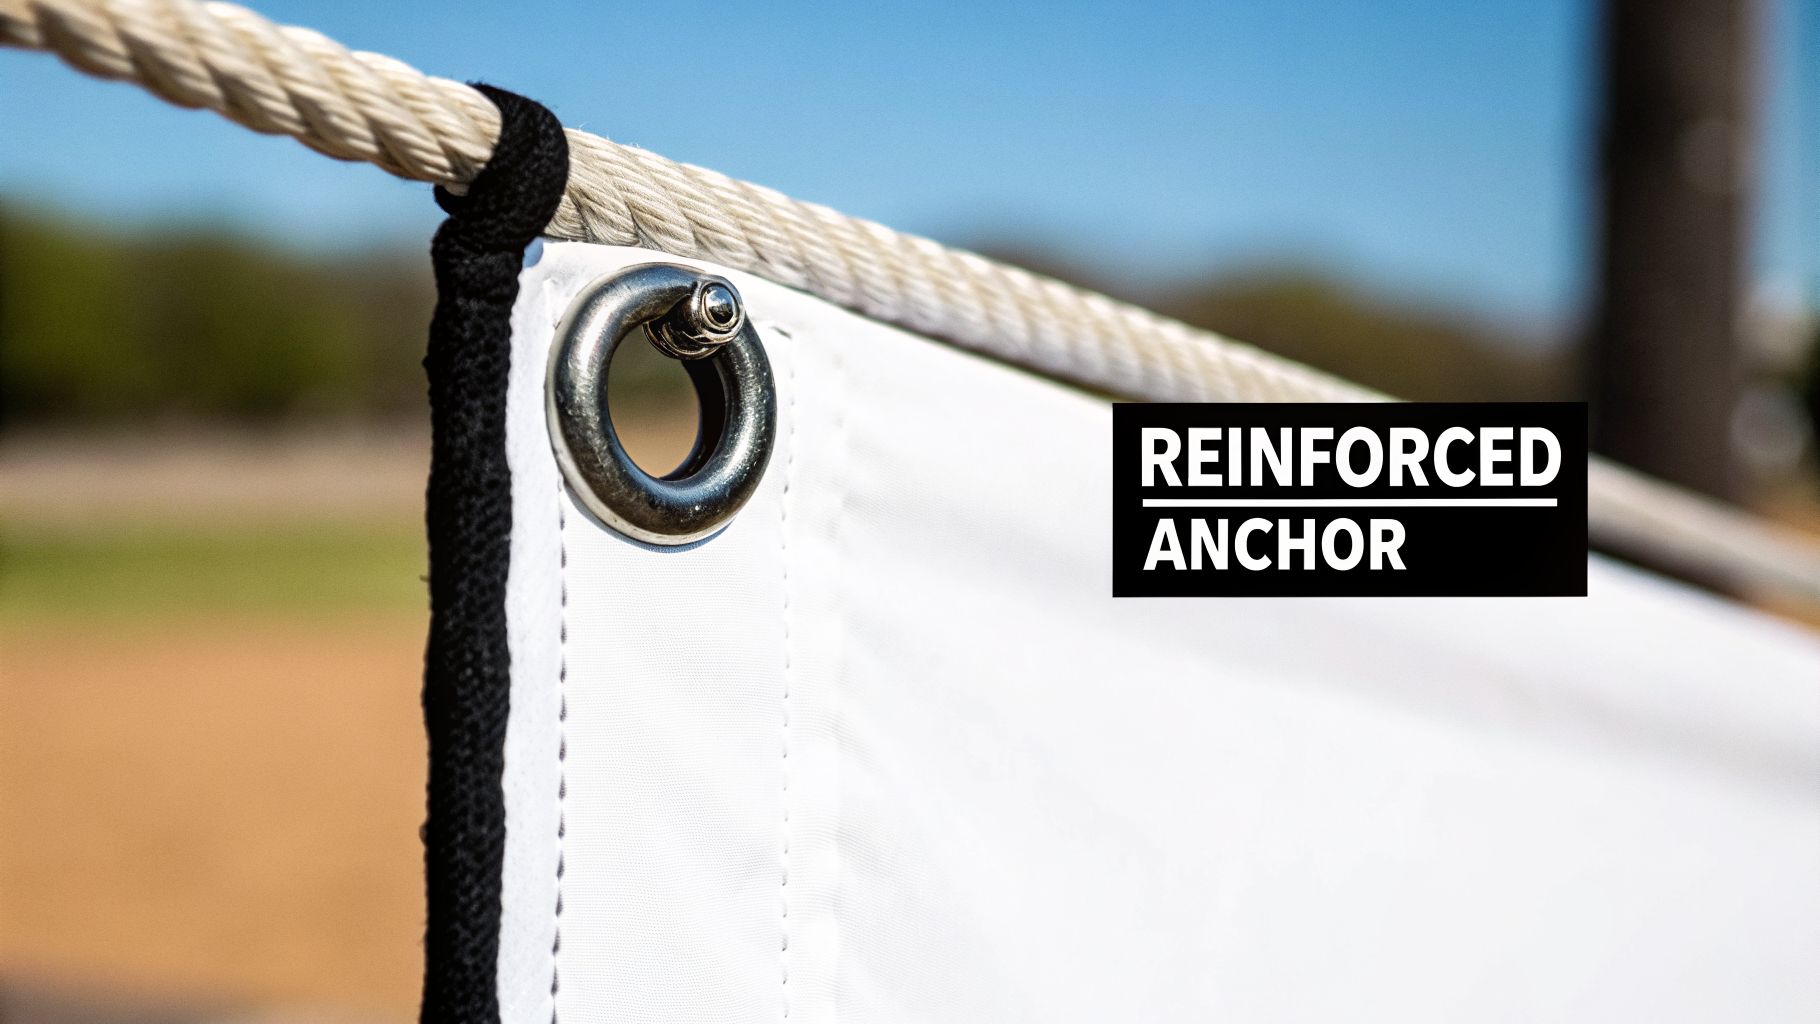
Grommets are the unsung heroes of professional, long-lasting signage. Their main job is to shield your banner from the constant stress of being hung up. When you thread a rope through a grommet, all that tension pulls on the reinforced ring, not on a single weak point in the vinyl.
This simple component is what stands between a polished, professional display and a torn, embarrassing mess.
Just imagine hanging a big outdoor banner with nothing more than raw holes punched in the corners. The very first strong gust of wind would put immense pressure on those weak points, and you’d inevitably see tears start to spread right across your design. Grommets stop that failure before it can even begin.
The Essential Role of Grommets
For nearly any banner installation, especially outdoors, these small rings are non-negotiable. They add the muscle needed to make sure your investment lasts.
Here's a quick breakdown of what grommets do for your banner.
Quick Guide to Banner Grommets
| Key Function | Primary Benefit | Common Use Case |
|---|---|---|
| Reinforce Hanging Points | Prevents rips and tears from ropes or ties. | Hanging a large vinyl banner on a fence in windy conditions. |
| Distribute Tension | Keeps the banner smooth, taut, and wrinkle-free. | Stretching a banner between two posts for a clean, flat display. |
| Increase Durability | Protects the material from constant wind and gravity. | Any long-term outdoor installation where the banner will be exposed to the elements. |
In short, grommets are the foundation of a banner that's built to last.
Their importance is impossible to overstate. The global market for these small but mighty components was valued at roughly USD 3.5 billion in 2026 and continues to grow, which shows just how critical they are to the entire signage industry.
Just as grommets provide structural integrity, the right visual backdrop can provide the foundation for an entire event. For more ideas on creating an impactful setting, you might explore options for a backdrop for hire. And if you're getting ready for a big promotion, our guide to outdoors advertising banners offers even more practical tips.
Choosing the Right Grommet Material and Size
Think of grommets as the unsung heroes of your banner. They’re the small, reinforced eyelets that do the heavy lifting, ensuring your investment hangs securely and looks sharp. Picking the wrong one is a recipe for disaster—think ugly rust stains, torn fabric, or a sagging banner that looks anything but professional.
Making the right choice from the start prevents these headaches. It’s a practical decision that protects your banner from the daily abuse of wind and weather, keeping your brand looking its best no matter the conditions.
The right grommet acts as a shield for your banner. It reinforces the hanging points, prevents the fabric from tearing under stress, and provides a durable anchor that's crucial for the sign's overall lifespan and professional appearance.
Comparing Common Grommet Materials
The first big decision is material, and it all comes down to where your banner will live. Just like you wouldn't wear summer shoes in a snowstorm, you can't expect an indoor-grade grommet to survive a tough outdoor environment.
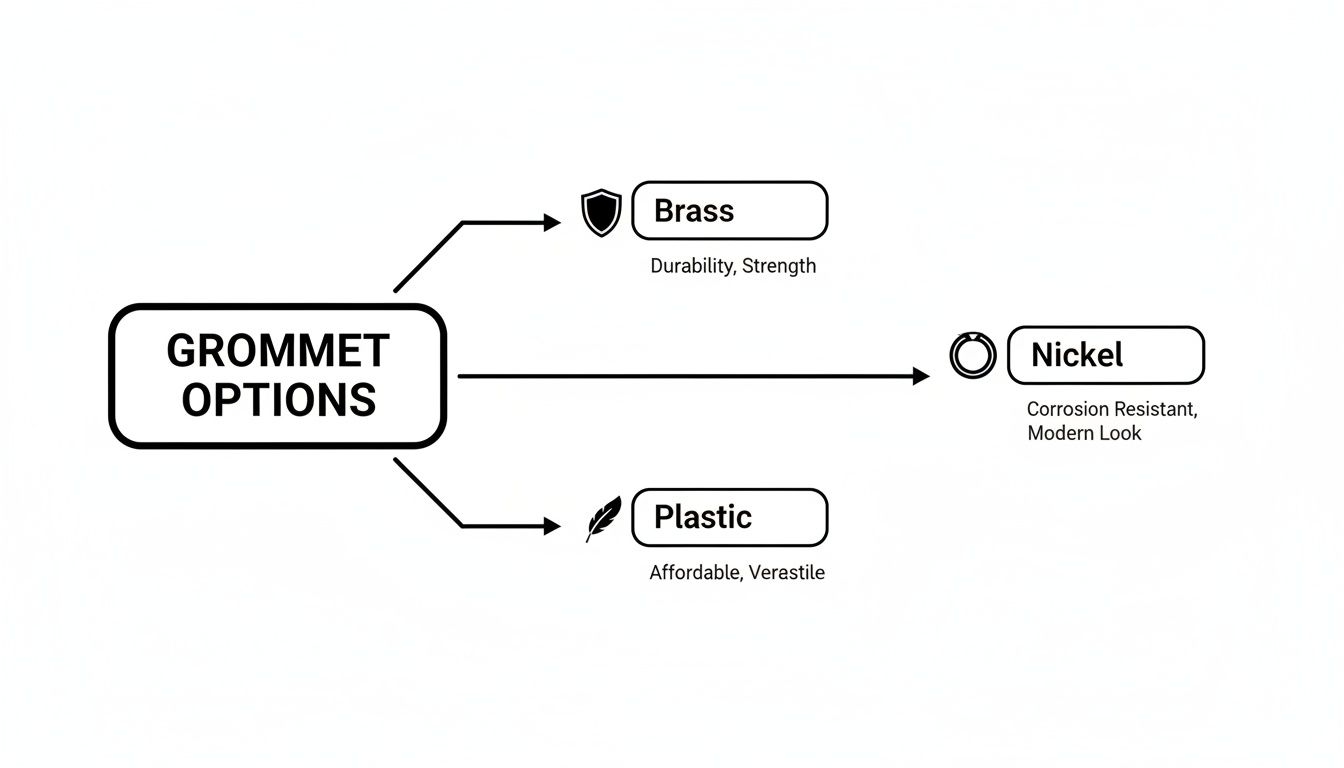
- Solid Brass: This is the gold standard for any outdoor banner, hands down. Brass is naturally rust-proof and corrosion-resistant, making it the perfect choice for long-term displays that will face rain, humidity, and whatever else the seasons throw at them.
- Nickel: With its sleek, silver finish, nickel is a strong and stylish alternative. It offers great durability and a modern aesthetic. While it holds up much better against corrosion than standard steel, brass still has the edge in consistently wet or humid climates.
- Plastic: Lightweight and available in various colors, plastic grommets are best saved for indoor use or very short-term outdoor events. They won’t rust, but they can become brittle and crack over time with UV exposure or in freezing temperatures.
Demystifying Grommet Sizing
Once you’ve landed on a material, it’s time to pick a size. Grommet sizes are identified by a number, and for vinyl banners, the undisputed industry standard is #2 (3/8-inch inner diameter). This size is the sweet spot—it’s big enough for most ropes, zip ties, and bungee cords without creating a massive hole that weakens the banner's edge.
Your goal is to match the grommet to your banner’s weight and the hardware you plan to use. If you have an exceptionally large or heavy banner, stepping up to a #3 (7/16-inch) grommet gives you extra strength and allows for thicker ropes. Of course, the banner material itself is just as important, and choosing the best material for outdoor signs is key to durability.
The need for tough, reliable components like these has been growing steadily. In fact, due to increased industrial demand, some markets for material components are seeing a projected growth rate of over 5% CAGR. You can read more about the growth drivers in material components on worldimagingnews.com.
Getting Grommet Placement and Spacing Right
Where you put the grommets is every bit as important as the material they're made from. Think of it like the buttons on a shirt—if they’re spaced too far apart, the fabric pulls, sags, and looks sloppy. It's the exact same principle with a banner, and getting it right is what separates a professional look from an amateur one.
Sure, the bare minimum is a grommet in each of the four corners. But for any banner larger than a few feet, that's just asking for trouble. The industry standard, and the one we stick to, is placing grommets every 24-36 inches along every side. This ensures the tension is spread evenly, which prevents that dreaded sag in the middle and stops the banner from flapping wildly in the wind—a motion that will shred the material over time.
The Pro-Move: Reinforce for Strength
Here's a common mistake we see all the time: punching a grommet straight through a single layer of banner vinyl. For a banner to truly last, its grommets must be set inside a welded or sewn hem. This creates a tough, double-thick layer of material right where the stress is highest, drastically reducing the risk of a grommet tearing out.
Think of a hem as the backbone for your grommets. By placing them inside this reinforced edge, you essentially double the material's strength at its most vulnerable points. This single step is often the difference between a banner that lasts for years and one that fails in the first strong gust of wind.
This quick overview shows how the choice of grommet material plays a huge role in your banner's lifespan.
As you can see, brass is the clear winner for long-term outdoor durability. Understanding these details about placement and reinforcement gives you the power to order the right product and install it like a pro. To see exactly how to put these principles into action, check out our guide on how to hang banners for a full walkthrough.
Installing Your Banner to Make It Last
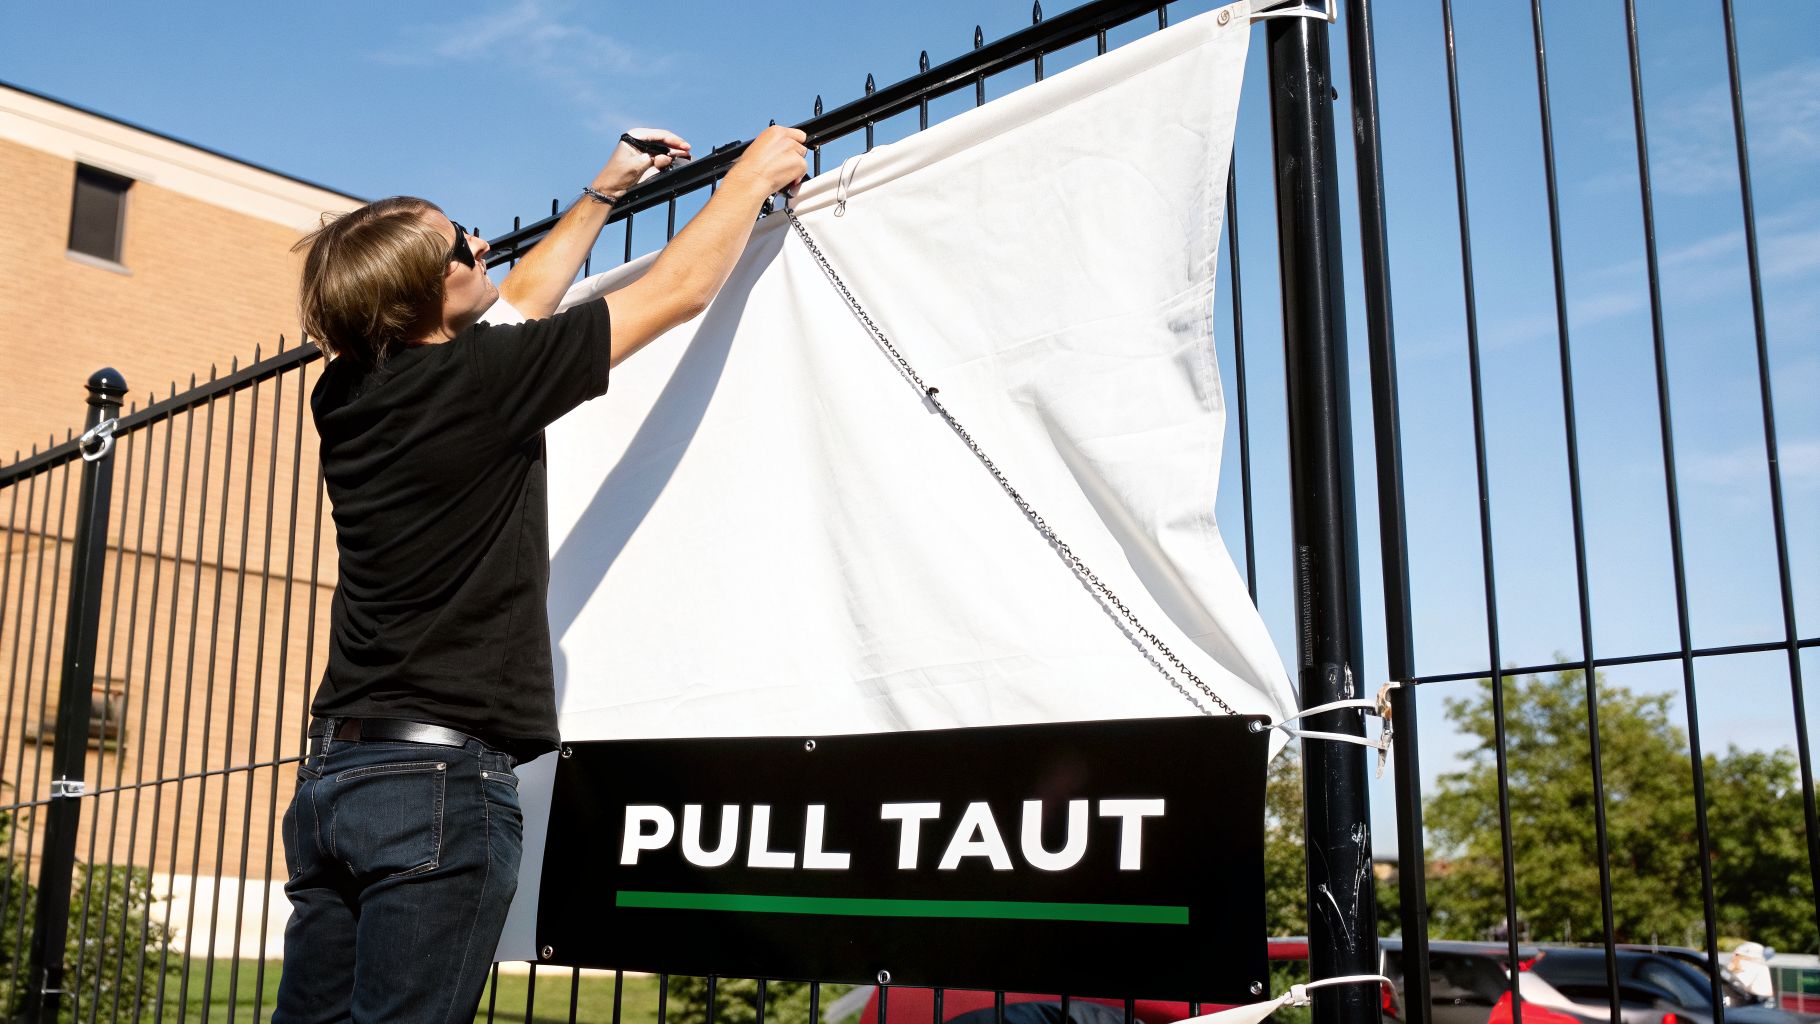
Even the toughest banner in the world is only as good as its installation. Think of it this way: you can have the best materials and printing, but if it’s hung poorly, it’s not going to last. The final step—hanging it up—is where all that quality gets put to the test.
The secret to a long-lasting, professional-looking banner is simple: pull it taut, but don't over-stretch it. You're aiming for a smooth, drum-like surface with no wrinkles or sags. Pulling too hard puts enormous stress on the grommets and seams, which is the fastest way to see your investment tear.
Picking the Right Tools for the Job
The hardware you use to hang your banner depends entirely on where you're putting it and what kind of weather it needs to handle.
- Bungee Cords: These are your best friend in windy areas. Their natural stretch allows the banner to flex with gusts of wind instead of fighting against them, which prevents tearing. For example, when hanging a 10-foot banner on a fence line exposed to crosswinds, bungees act as shock absorbers, protecting the grommets from being ripped out.
- Zip Ties: For a tight, semi-permanent hold on a chain-link fence, you can't beat zip ties. They're strong, cheap, and make for a quick and secure installation. A practical tip is to use heavy-duty, UV-resistant zip ties to prevent them from becoming brittle in the sun.
- Rope or Cable: When you're mounting a banner to a wall or stretching it between two posts, rope gives you the flexibility to get the tension just right. For larger banners, always use a 'star' pattern—tightening opposite corners and sides a little at a time—to spread the tension evenly.
A well-hung banner is a powerful, tangible piece of marketing that cuts through digital noise. It's why the global banner printing market was valued at USD 11.2 billion in 2023 and continues to grow. You can dive deeper into the trends in the advertising print market on plastgrommet.com.
Common Mistakes That Ruin Banners
We've seen it all. Steer clear of these common pitfalls to keep your banner looking great:
- Using sharp-edged wire or metal hooks that can slice right through a grommet under tension.
- Tying complicated knots that create single, high-stress points on the material.
- Hanging the banner too loosely. This is just as bad as too tight—it lets the wind whip the fabric back and forth, eventually shredding it.
Getting the installation right means your message stays visible and your banner lasts season after season. If you're tackling a more involved project, our guide to commercial sign installation offers even more pro tips.
When to Choose Alternatives to Grommets
While grommets are the workhorse for most hanging banners, they aren't a one-size-fits-all solution. Knowing when to swap them for a different finishing option is what separates a good installation from a great one—and saves you a ton of headaches down the road.
Think of it like picking the right tool from a toolbox. A hammer is perfect for driving nails, but you'd never use it on a screw. In the same way, the specific demands of your banner display call for the right finishing method.
Pole Pockets for a Polished Look
Pole pockets are your best bet when you want a clean, high-end presentation without any visible hardware. We simply sew a sleeve into the top and/or bottom edge of the banner, allowing a pole or dowel to slide right through. The result is a taut, smooth surface that looks incredibly professional.
This method really shines in a few key scenarios:
- Parade Banners: When held between two people, the poles create a rigid, easy-to-carry frame.
- Indoor Displays: Hung from a ceiling or mounted on a stand, pole pockets offer a refined, gallery-like feel.
- Light Pole Banners: Specially designed brackets grip the poles, creating those crisp vertical banners you see lining city streets.
They are the go-to for indoor events where wind isn't a concern and a flawless backdrop is essential. In fact, pole pockets are a top choice for creating a high-impact visual focus, which you can learn more about in our guide to step and repeat signs.
Heavy-Duty Options for Tough Conditions
What about massive banners or displays that have to battle high winds and constant tension? This is where standard grommets can fall short. For these extreme situations, D-rings with reinforced webbing are the undisputed champions.
Instead of a small, punched hole, this method involves sewing heavy-duty webbing directly into the banner's hem. Strong metal D-rings are then attached to this webbing, creating a far more robust anchor point.
This approach spreads the stress out across the entire length of the webbing, not just one small point. It’s the professional-grade solution for oversized banners on buildings or large outdoor structures, giving you maximum strength against the constant pull of wind and gravity.
Making the right call from the start is crucial for your banner's appearance and lifespan. To help you decide, here’s a quick comparison of the most common finishing methods.
Grommets vs. Alternative Finishing Options
| Finishing Method | Best For | Main Advantage | Consideration |
|---|---|---|---|
| Grommets | General outdoor & indoor use; hanging with rope or zip ties. | Versatility & cost-effectiveness. | Can tear out under extreme wind load. |
| Pole Pockets | Indoor backdrops, parades, light pole banners. | Clean, seamless appearance with no visible hardware. | Not ideal for high-wind areas; requires a pole. |
| D-Rings & Webbing | Very large banners, high-wind locations, building wraps. | Maximum strength and durability. | Higher cost; overkill for smaller or indoor signs. |
| Hemmed Edges Only | Simple indoor wall hanging; temporary displays. | Simple and clean; allows for direct attachment. | No built-in hanging points; not for hanging freely. |
Finally, for the simplest indoor applications, like tacking a banner directly to a wall for a temporary event, just hemmed edges with no grommets will do the job perfectly. Knowing your options ensures every banner you install looks professional and holds up exactly as it should.
Answering Your Top Questions About Banner Grommets
Even when you know the basics, a few practical questions always pop up when you're about to order or hang a new banner. Getting these details right is the difference between a sign that looks professional for years and one that fails after the first big storm.
Think of this as the final checklist before you send your banner out into the world. We’ve gathered the most common questions we hear from business owners and installers to help you avoid costly mistakes.
How Far Apart Should Banner Grommets Be?
For a taut, professional display, the sweet spot is placing grommets every 24 to 36 inches around the entire perimeter of the banner. This isn't just a random number—it's the industry standard for distributing tension perfectly.
When you space them too far apart, you invite sagging in the middle and violent flapping in the wind. That constant whipping motion is what causes premature tearing and makes your banner look worn out long before its time.
Can You Add Your Own Grommets to a Banner?
Yes, you can buy a DIY grommet kit and add them yourself, but you need to be extremely careful. The real strength of a banner doesn't come from the grommet itself, but from the reinforced hem it's set in.
Punching a grommet straight through a single layer of vinyl creates a massive weak point. A professional, machine-set grommet inside a welded or sewn hem is always the stronger choice for outdoor durability. It’s built to handle serious tension without ripping out.
Do All Outdoor Banners Need Grommets?
While grommets are the go-to for most hanging situations, they aren't always the best tool for the job. The key is to match the banner’s finishing to its environment.
For instance, if you're creating banners for a parade or to hang between light poles, pole pockets are a much better solution. They create a clean, drum-tight look with no hardware showing. It’s all about picking the right finish for the specific display you have in mind.
What Is the Most Durable Grommet for Outdoor Signs?
When your banner is going to live outdoors, nothing beats solid brass. It’s the undisputed champion for a reason.
Brass is naturally rust-proof and won't corrode, which means you’ll never see those ugly orange rust streaks running down your beautiful design after a few rainstorms. It holds its own against sun, wind, and humidity, ensuring your investment looks great for the long haul.
Ready to create a banner that stands out and stands up to the elements? The team at On Display Signs, Inc. offers expert design, fabrication, and installation services to ensure your signage is perfect from start to finish. Learn more about our custom banner solutions.


