Think of your tents for trade shows as your physical handshake with the world. In a noisy, crowded event hall, your tent is the very first thing people notice. It’s a powerful marketing tool that broadcasts your brand’s presence from clear across the floor.
A professional, inviting space doesn't just draw people in; it also keeps your team and expensive equipment protected from the elements.
Your Tent Is Your First Impression
On a packed event floor, your trade show tent is your most important visual asset, acting as a beacon for potential clients. It’s essentially a 3D billboard that communicates your brand’s identity long before anyone on your team even says hello. A sharp, well-designed tent instantly signals professionalism, stability, and a keen eye for detail—all qualities that attendees will subconsciously connect with your business.
This is a serious investment, and it goes far beyond just providing shade. The global market for exhibition tents is massive. Recent data shows the market hit $3,259.51 million and is on track to reach $4,012 million. North America is leading the way, with a market size of $1,548.63 million. This explosion in growth shows just how seriously businesses are taking their physical presence at events.
Building Your Brand from the Ground Up
The visual punch of your tent sets the stage for every conversation you'll have. We're not just talking about slapping a logo on the roof; it's about creating a cohesive, immersive environment that feels like your space. This is where your bigger signage strategy comes into play. To make sure your tent's graphics align perfectly with your other displays, you can find great inspiration in our guide on ideas for business signs.
A powerful first impression really comes down to a few key things:
- Brand Consistency: Your tent must use the same colors, fonts, and logos found on your website and other marketing materials. This creates instant recognition and reinforces your identity.
- Professional Look and Feel: A clean, sturdy, and brightly printed tent communicates quality and reliability. It makes attendees more likely to trust your brand right off the bat.
- Clear Messaging: Use the tent’s large surfaces to broadcast your core message or value proposition. Make sure it's big, bold, and easy to read from a distance.
Your tent isn’t just a piece of your booth; it is the booth. It carves out your territory on the floor and creates a controlled environment where you shape the customer experience from start to finish.
To really guarantee your trade show tent makes the strongest possible impression, it pays to look at some innovative trade show booth design ideas that can help your brand truly stand out from the crowd. This guide will walk you through all the practical steps to make that happen.
Selecting the Right Size and Layout
Picking the right tent size is so much more than just matching your booth space on a floor plan. It’s really about designing the experience you want visitors to have. The best tents for trade shows are planned around how people will move, talk, and engage—not just where you’ll put your products.
A standard 10×10 foot space is a classic for a reason. It's the perfect home for a boutique brand with a simple welcome counter or a single product display. This size is easy to manage, budget-friendly, and gives you a focused, intimate setting to connect with attendees. For example, a small artisan coffee roaster could use a 10×10 tent to create a mini-cafe feel with a tasting bar at the back and space for two staff members.
But jumping up to a 20×20 tent is a total game-changer. Imagine a software company using that space to create different zones. You could have one area for live demos, a corner with comfy chairs for serious client conversations, and still have plenty of room for people to walk through without feeling crowded. That kind of segmentation makes you look professional and prepared.
This flowchart really gets to the heart of what your tent is doing for you—it's your brand's first handshake, a professional meeting space, and a safe harbor for your assets all rolled into one.
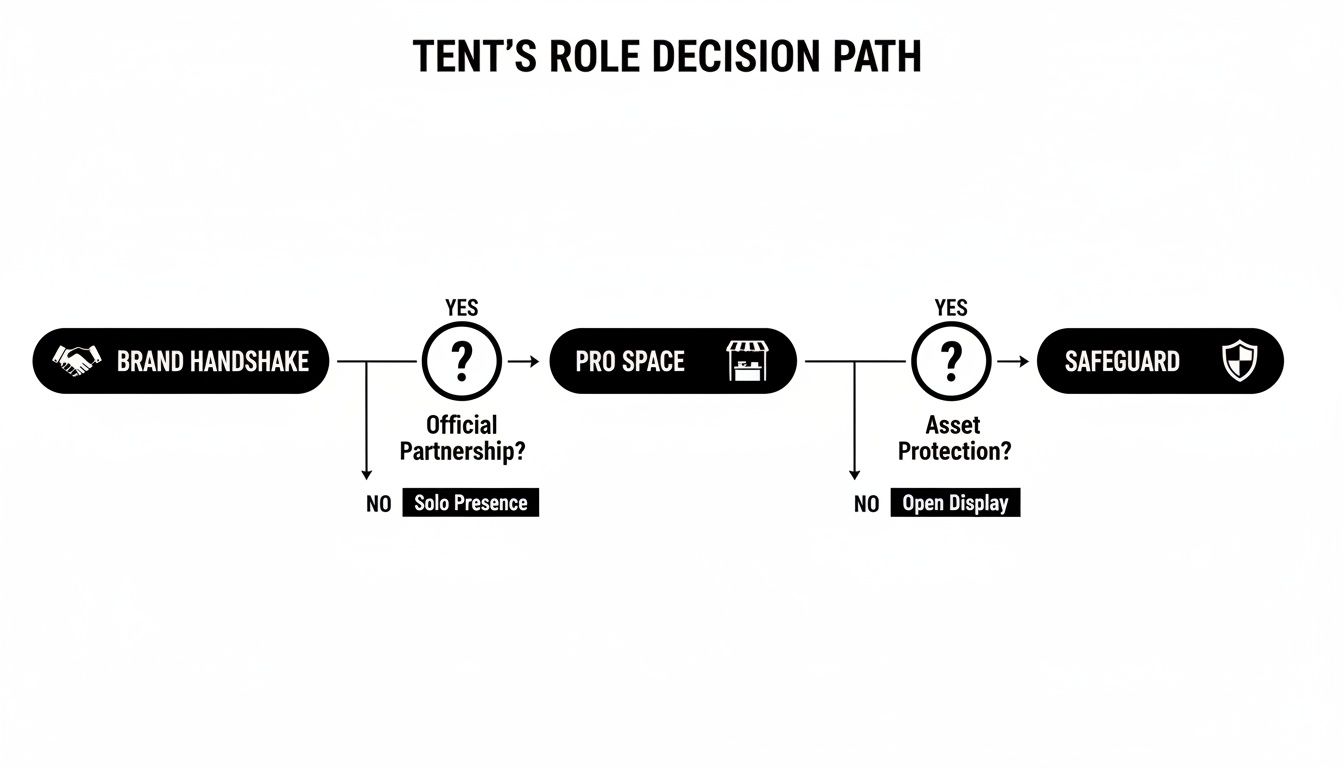
As you can see, the role of your tent evolves quickly from just grabbing attention to becoming a functional and protected extension of your business. It’s a surprisingly versatile asset.
Mapping Out Visitor Flow
Beyond the raw dimensions, how you lay out the inside of your tent is where the magic happens. Your goal should always be an open, welcoming vibe that pulls people in, not a cluttered mess that makes them pause and turn away. A good layout creates a natural journey through your exhibit.
First thing’s first: define a clear entry point. A common mistake is plopping a huge table right at the entrance, which acts as a physical and psychological barrier. Instead, try placing your main counter or welcome station just off to the side to create an open path.
From there, think about the story you want to tell. Your visitor flow should guide people past your key products or information in a logical sequence. It’s the same principle retail stores use to lead you deeper into their space. A smart visitor flow is more than just managing traffic; it's a critical part of your sales funnel.
A well-planned layout can make a huge difference in dwell time. When an attendee feels comfortable and has room to breathe, they are far more likely to stick around, ask questions, and turn into a real lead.
A Practical Sizing and Layout Guide
To make things easier, here’s a quick reference table. It’s designed to help you visualize how different tent sizes can serve different needs by matching common booth dimensions with capacity and potential layouts.
Trade Show Tent Sizing and Layout Guide
| Booth Size | Recommended Tent Size | Typical Capacity | Example Layout Configuration |
|---|---|---|---|
| 10' x 10' | 10' x 10' Pop-Up Tent | 2-4 People | One 6' table at the back, two high-top tables for casual chats, and one product pedestal display. |
| 10' x 20' | 10' x 20' Frame Tent | 5-8 People | Two distinct zones: one side for product demos with a monitor, the other with a small seating area. |
| 20' x 20' | 20' x 20' High-Peak Tent | 10-15 People | A central welcome kiosk, dedicated demo stations along the sides, and a semi-private meeting area in a back corner. |
Ultimately, your layout needs to support your goals. If you're there to generate leads, you want an open space where your team can easily start conversations. If you’re focused on in-depth demos, you need to carve out a dedicated area for that activity.
The core principles aren't that different from designing an inviting storefront. In fact, for more inspiration on grabbing attention, our guide on retail window display ideas has some great tips you can adapt for your trade show booth.
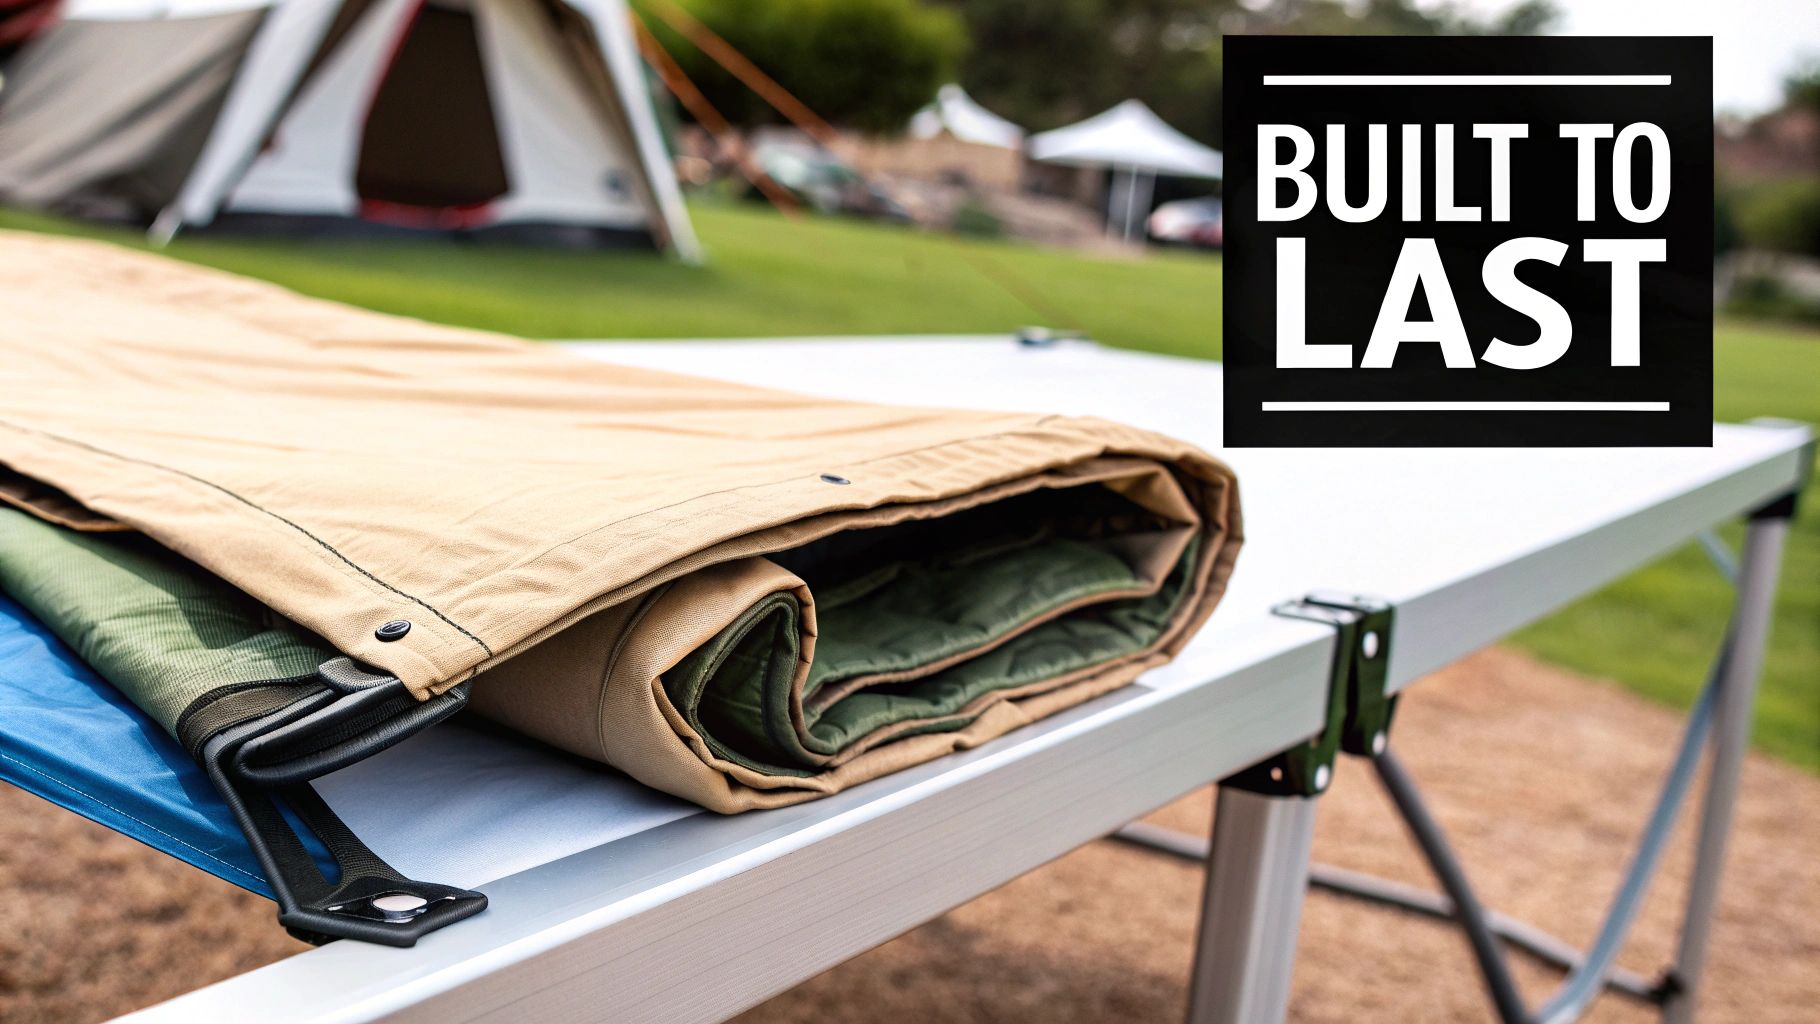
Understanding Tent Materials and Frame Durability
The actual materials of your tents for trade shows are what separate a reliable, professional asset from a one-show wonder. Choosing wisely here is more than a technical detail; it’s an investment in your brand’s image and a defense against embarrassing failures on the event floor.
When you’re face-to-face with a potential client, the last thing you want is a wobbly frame or a rip in your canopy. Let's dig into what really matters for the two core components: the canopy fabric and the structural frame. These choices will dictate how well your tent holds up to the grind of repeated setups, shipping, and the occasional surprise downpour.
Choosing the Right Canopy Fabric
For the tent top itself, the conversation almost always narrows down to two materials: polyester and vinyl. Each has its place, and the right choice depends on your specific needs.
Polyester is the go-to for most exhibitors, and for good reason. It’s lightweight, making it much easier for your team to manage and transport. More importantly, its fabric is the perfect canvas for dye-sublimation printing, giving you those razor-sharp, vibrant graphics that make a brand pop from across the aisle.
Vinyl, on the other hand, is the heavy-duty option. It’s noticeably heavier and tougher than polyester, offering superior durability and weather resistance. If you’re frequently setting up outdoors where wind and rain are real threats, the ruggedness of vinyl delivers some serious peace of mind.
A high-quality canopy is your first line of defense. Investing in a fabric with UV-resistant coatings and professional-grade stitching will not only keep your graphics from fading but will also prevent tears and leaks, preserving your professional image event after event.
The principles behind choosing a great canopy fabric are similar to those for other display materials. To get a better feel for your options, check out our guide on choosing the right sign board material.
Aluminum Versus Steel Frames
The frame is the skeleton of your tent. Its strength is everything. The decision here typically comes down to a classic matchup: aluminum versus steel.
An aluminum frame is all about portability. For teams that are constantly on the road, traveling from show to show, its lightweight nature is a huge plus. It makes setup faster, teardown easier, and the whole process less physically taxing on your staff. Commercial-grade aluminum is plenty strong for most indoor uses, but its main selling point is convenience.
A steel frame is built for pure strength. It’s heavier, sure, but that extra weight provides a rock-solid, rigid structure. For any large tent or outdoor setup where wind is a legitimate concern, a steel frame is the more reliable—and safer—choice. It’s the workhorse you need when you can’t afford to have your structure fail.
Think of it this way: a marketing team flying to a dozen shows a year will love the easy handling of an aluminum frame. But a local brewery setting up a big 20×20 tent at an outdoor festival every weekend needs the unshakeable stability of a steel frame.
Why Durability Matters More Than You Think
This isn't just about picking materials; it's about avoiding the most common pitfalls of cheap tents. While many consumer-grade canopies get praise for easy assembly (34.4%) and a sturdy frame (15.9%), a massive 61.1% of negative feedback comes down to one thing: poor quality. For professional use, you simply can't afford to be in that majority.
Investing in a well-made tent from the start saves you from the classic trade show headaches—the bent frame you discover during setup, the torn canopy after one trip, or the faded, unprofessional look of a display that couldn't handle the sun. Your tent is a direct reflection of your brand, and a durable one sends a message of quality before you say a single word.
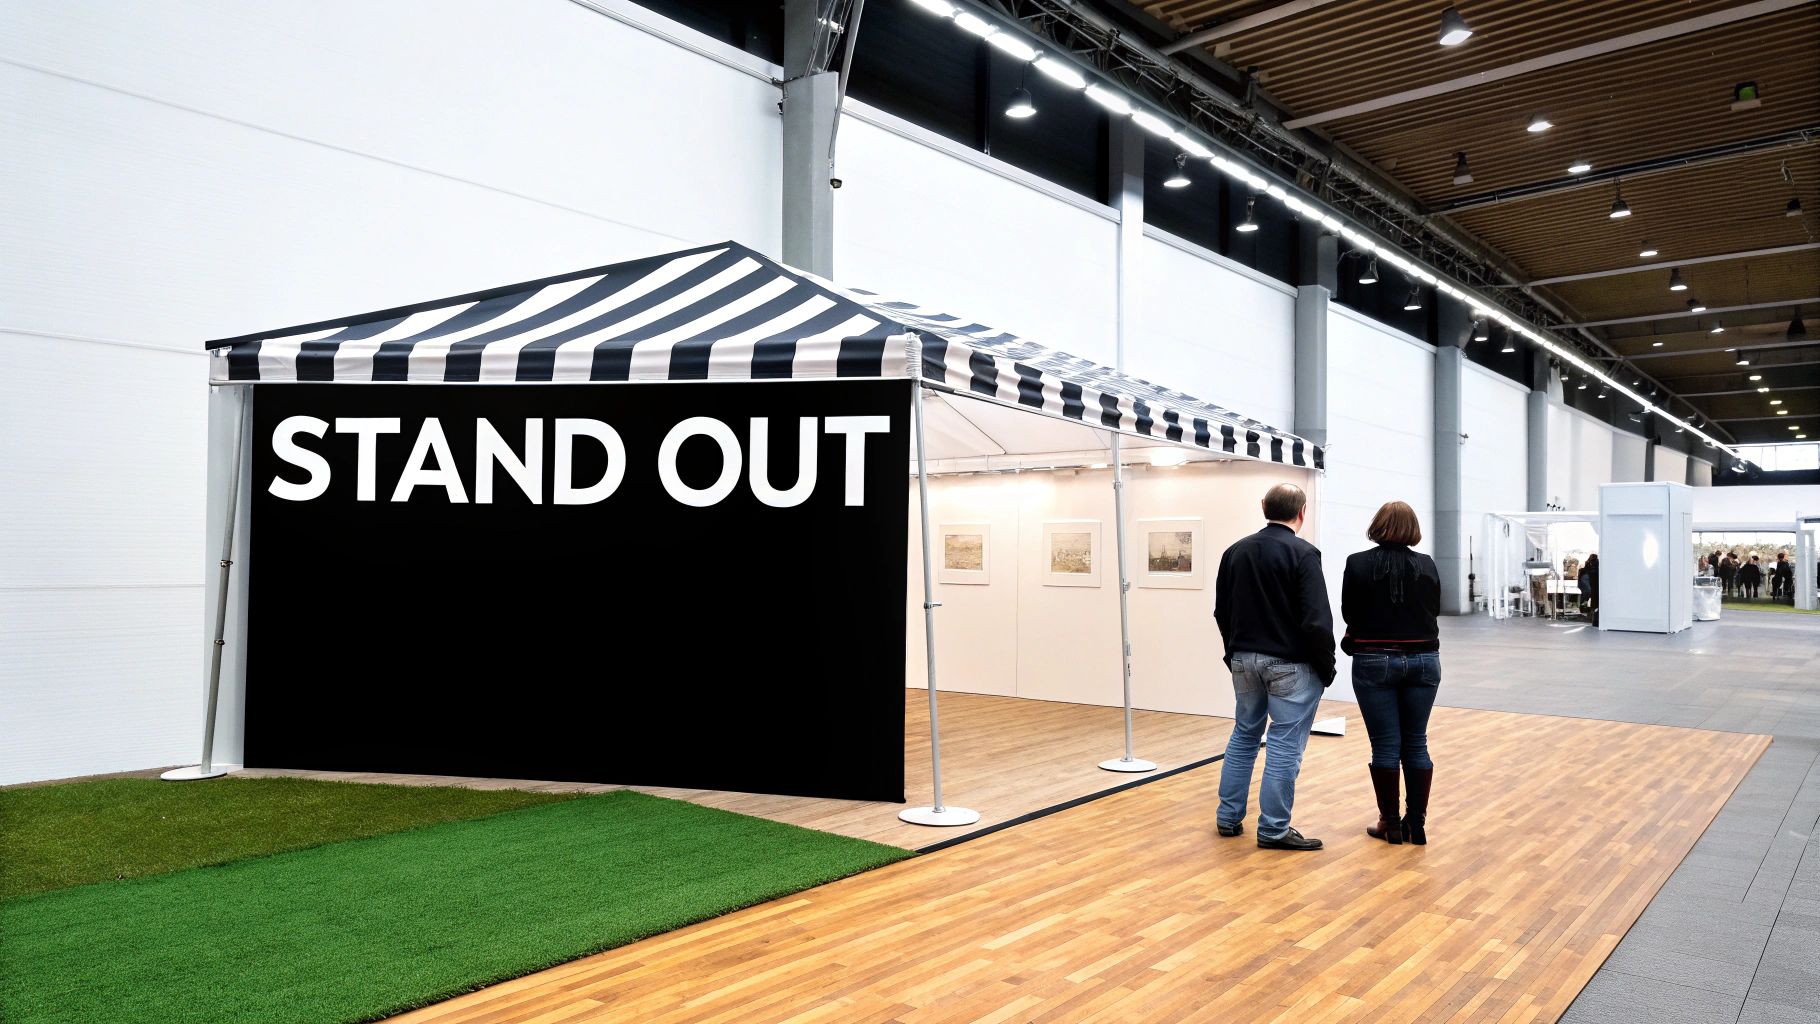
Using Custom Graphics to Attract Visitors
Let's be honest: a plain, unbranded tent is just shelter. A custom-branded tent, on the other hand, is a magnet for foot traffic. On a chaotic trade show floor, your graphics are your first and best chance to stand out, make a real statement, and pull attendees toward your booth from halfway across the hall.
The visual punch of custom graphics on tents for trade shows is impossible to ignore. This is your chance to turn a purely functional piece of gear into a three-dimensional billboard for your brand. High-quality printing completely transforms the tent into an engaging visual that people actually notice.
Making Graphics That Last
The secret to graphics that stay vibrant and sharp event after event comes down to the printing method. For tent canopies, dye-sublimation is the undisputed gold standard. Instead of just sitting on top of the fabric like a cheap sticker, the ink is infused directly into the fibers, becoming a permanent part of the material itself.
This process gives you incredibly crisp, brilliant graphics that resist fading from harsh UV lights. More importantly, they won't crack, peel, or scratch off during the rough-and-tumble reality of setup, teardown, and transport. It’s a small detail that protects your investment in the long run.
Strategic Design for Maximum Visibility
When you’re designing your tent graphics, you need to put yourself in the shoes of an attendee navigating a crowded aisle. What’s going to catch their eye? You need to think about sightlines from every angle, both near and far.
Here are a few practical tips to make sure your tent gets the attention it deserves:
- Put your logo up high. The peak of the tent is prime real estate. Placing your logo there guarantees it can be seen above the heads of the crowd and from across the convention hall.
- Use the front valance for your core message. That short flap of fabric hanging down from the canopy edge—the valance—is right at eye level from a distance. Use it for your company name, a quick tagline, or your website.
- Don't be shy with high-contrast colors. Bold colors that pop are essential for grabbing attention. Make sure to consider how your brand colors will look under the notoriously bright and often fluorescent lighting of a convention center.
Your tent’s design should do more than just slap a logo on a canopy; it needs to communicate your brand’s personality. A sleek, minimalist look sends a completely different message than a loud, colorful one. Make sure your graphics are telling the right story.
When you think about how much it costs to even be at an event, investing in powerful graphics delivers a strong return. With the average cost for a 20×20 booth space running anywhere from $40,000-$60,000 and custom booths costing $125-$325+ per square foot, high-impact tent graphics are a smart, cost-effective way to get more out of your spot. A well-branded tent makes sure every dollar you spend on floor space is working harder for your brand recognition.
Creating an Immersive Brand Experience
Your graphics shouldn't just stop at the canopy. Custom-printed side and back walls are what elevate your booth from a simple space into a truly immersive brand environment. These walls are critical for blocking out the visual noise and chaos from your neighbors, giving you complete control over the backdrop of your visitors' experience.
With custom walls, you can:
- Showcase massive, high-resolution product photos.
- Tell a visual story about your company’s mission or history.
- Create a professional step-and-repeat background perfect for photos.
This level of detail creates a cohesive and polished atmosphere that makes your brand far more memorable. It’s a pro move that separates the experienced exhibitors from the rookies. And if your brand uses a variety of signage, understanding the different printing processes is key. For example, our guide on printing on Coroplast has insights that can help you maintain brand consistency across all your different display materials.
Mastering Setup Logistics and Safety
A successful trade show presence goes way beyond a great-looking tent. It’s about nailing the execution—a smooth, safe, and stress-free setup on event day. Mastering how you transport, assemble, and secure your tents for trade shows is what separates the seasoned pros from exhibitors fumbling with parts and risking safety violations.
This process starts long before you even see the venue. Your first line of defense against damage is proper transport. Always use the heavy-duty, wheeled bags that come with professional-grade tents. Tossing a folded frame and canopy into a truck bed unprotected is just asking for scuffs, rips, and bent poles.
Before you head out, do a quick inventory check. Lay out every single component—frame, canopy, side walls, weights, and all the hardware—and tick it off a master list. Forgetting one tiny connector pin can derail your entire setup, leaving you scrambling on a chaotic show floor.
A Methodical Approach to Safe Assembly
When you arrive at your booth space, resist the urge to rush. A careful, methodical setup prevents damage to both the tent and your team. You should always have at least two people to assemble a pop-up tent. Trying to wrestle the frame open by yourself puts uneven stress on the trusses, which is the number one cause of bent frames.
Work together to walk the frame open, lock the corner sliders into place, and then raise the legs. With one person on each side, the frame expands evenly without straining the joints. This little bit of teamwork can save you from costly repairs down the road. Juggling these moving parts is a core skill, and you can dive deeper into these strategies in our guide to effective signage project management.
The Non-Negotiable Rules of Tent Anchoring
Proper anchoring is the single most critical safety step, and frankly, it's where a lot of exhibitors get it wrong. An unsecured tent can become a dangerous projectile in a single gust of wind, creating a massive liability. The right method depends entirely on your setup surface.
- On Grass or Dirt: Use heavy-duty, commercial-grade stakes driven deep into the ground at an angle. The small, flimsy pegs that come with a recreational camping tent won't cut it.
- On Asphalt, Concrete, or Indoors: Since stakes are out, you must use weights. Your best bet is purpose-built weight plates or sandbags designed specifically to wrap around or stack on canopy legs.
- Weight Requirements: As a general rule, you need at least 40-50 pounds of weight per leg for a standard 10×10 tent in calm weather. For larger tents or windy conditions, you'll need significantly more.
Never, ever use makeshift anchors like coolers, product boxes, or furniture. They aren't heavy enough and can shift easily, leaving your tent vulnerable. Event staff and fire marshals are trained to spot improper anchoring and will not hesitate to shut your booth down.
Safety Takeaway: Your tent isn't secure until every leg is anchored according to both the manufacturer's and the venue's guidelines. Treat anchoring as the final, most crucial step of your setup—not an afterthought.
Navigating Venue Rules and Fire Codes
With major trade shows using millions of square feet of exhibit space, venue regulations have become incredibly strict. Proper tent anchoring and following fire codes are non-negotiable. This makes your logistical planning just as important as your booth's design.
Before you even think about packing, get your hands on the exhibitor manual and read the rules carefully. Look for specific sections on booth structures, anchoring requirements, and fire safety. Most venues mandate that all fabrics—including your tent canopy and walls—are certified as fire-retardant. Look for a CPAI-84 or NFPA 701 tag and be prepared to show the certificate to the fire marshal.
While you’re focused on your tent, don't forget the bigger picture. Understanding general venue security best practices will help protect your products and your team throughout the event. Sorting out these details ahead of time saves you from last-minute headaches and ensures you have a safe and successful show.
Frequently Asked Questions About Trade Show Tents
No matter how buttoned-up your plan is, questions always pop up when you're managing the logistics of tents for trade shows. We’ve heard them all. Here are some of the most common ones we get, with straightforward answers to help you navigate the process like a pro.
Should I Rent or Buy a Trade Show Tent?
This is the classic debate, and the answer almost always circles back to one thing: frequency. If your company is on the trade show circuit, attending several events a year, buying your tent is a smart investment that pays for itself quickly. Owning it gives you total control over branding, guarantees a consistent, professional look everywhere you go, and means it’s always ready when you are.
Renting can work for a one-off event or if you suddenly need a specific size you'll likely never use again. But you have to be ready for the trade-offs. Rental tents offer minimal (if any) branding options—you're usually just getting a blank canopy—and you’re at the mercy of the rental company’s inventory and how well they’ve maintained it.
What Are the Biggest Mistakes People Make When Setting Up a Tent?
The number one mistake, and the most dangerous, is improper anchoring. A tent that isn't secured can become a giant kite in a sudden gust of wind, creating a massive safety hazard. Don't ever cut corners here. Use the right amount of weight for hard surfaces or heavy-duty stakes for grass.
Another rookie error is skipping a practice run. Setting the tent up once at your own facility before the show is priceless. You’ll confirm you have all the parts, your team gets familiar with the process, and you avoid a ton of stress on show day. Lastly, try to find the flattest ground possible; setting up on a severe slope can put dangerous stress on the frame.
Key Insight: That 15-minute practice setup in the warehouse a week before the show? It can save you hours of panic and potential disaster on the trade show floor. It's the cheapest insurance policy you can get against setup-day chaos.
How Do I Clean and Store My Tent to Make It Last?
Good maintenance is what turns a one-season tent into a five-year asset. After every show, take a few minutes to clean the canopy fabric. Most dirt and scuffs come off easily with a simple solution of mild soap and water.
Here’s the most important part: make sure the canopy is 100% dry before you fold it for storage. Packing it up while it’s even a little damp is a recipe for mildew, which can permanently stain and ruin the fabric. Give the frame a quick wipe-down, too, and check for any loose hardware or bent parts. Store everything in its protective bag in a cool, dry place, and your booth will look sharp for years.
Are There Fire Safety Rules for Tents?
Absolutely, and they are not optional. Nearly every convention center and event venue requires that exhibit materials, especially big fabric structures like tents, are certified as fire-retardant. It's a huge liability issue for them.
When you buy a tent, look for a fire-retardant certification tag stitched into the fabric or ask for an official certificate. The standards you’ll see most often are CPAI-84 and NFPA 701. Always check the specific requirements with the event organizer well ahead of time. Pro tip: keep a copy of that fire certificate with you during setup. Fire marshals do walk the floor, and they will ask to see it.
Ready to create a trade show presence that truly stands out? The team at On Display Signs, Inc. has the expertise to design and fabricate a custom tent that captures your brand's unique identity. From vibrant, durable graphics to sturdy, reliable frames, we manage every detail to ensure you make a powerful impression. Explore our custom trade show solutions today!
