A step and repeat sign is a large backdrop with a repeating logo pattern, specifically designed to turn any event space into a professional photo opportunity. The entire point is to guarantee your brand gets prime visibility in every single photo, transforming pictures your guests take into powerful marketing assets that spread across social media.
The Secret to Turning Attendees into Brand Ambassadors
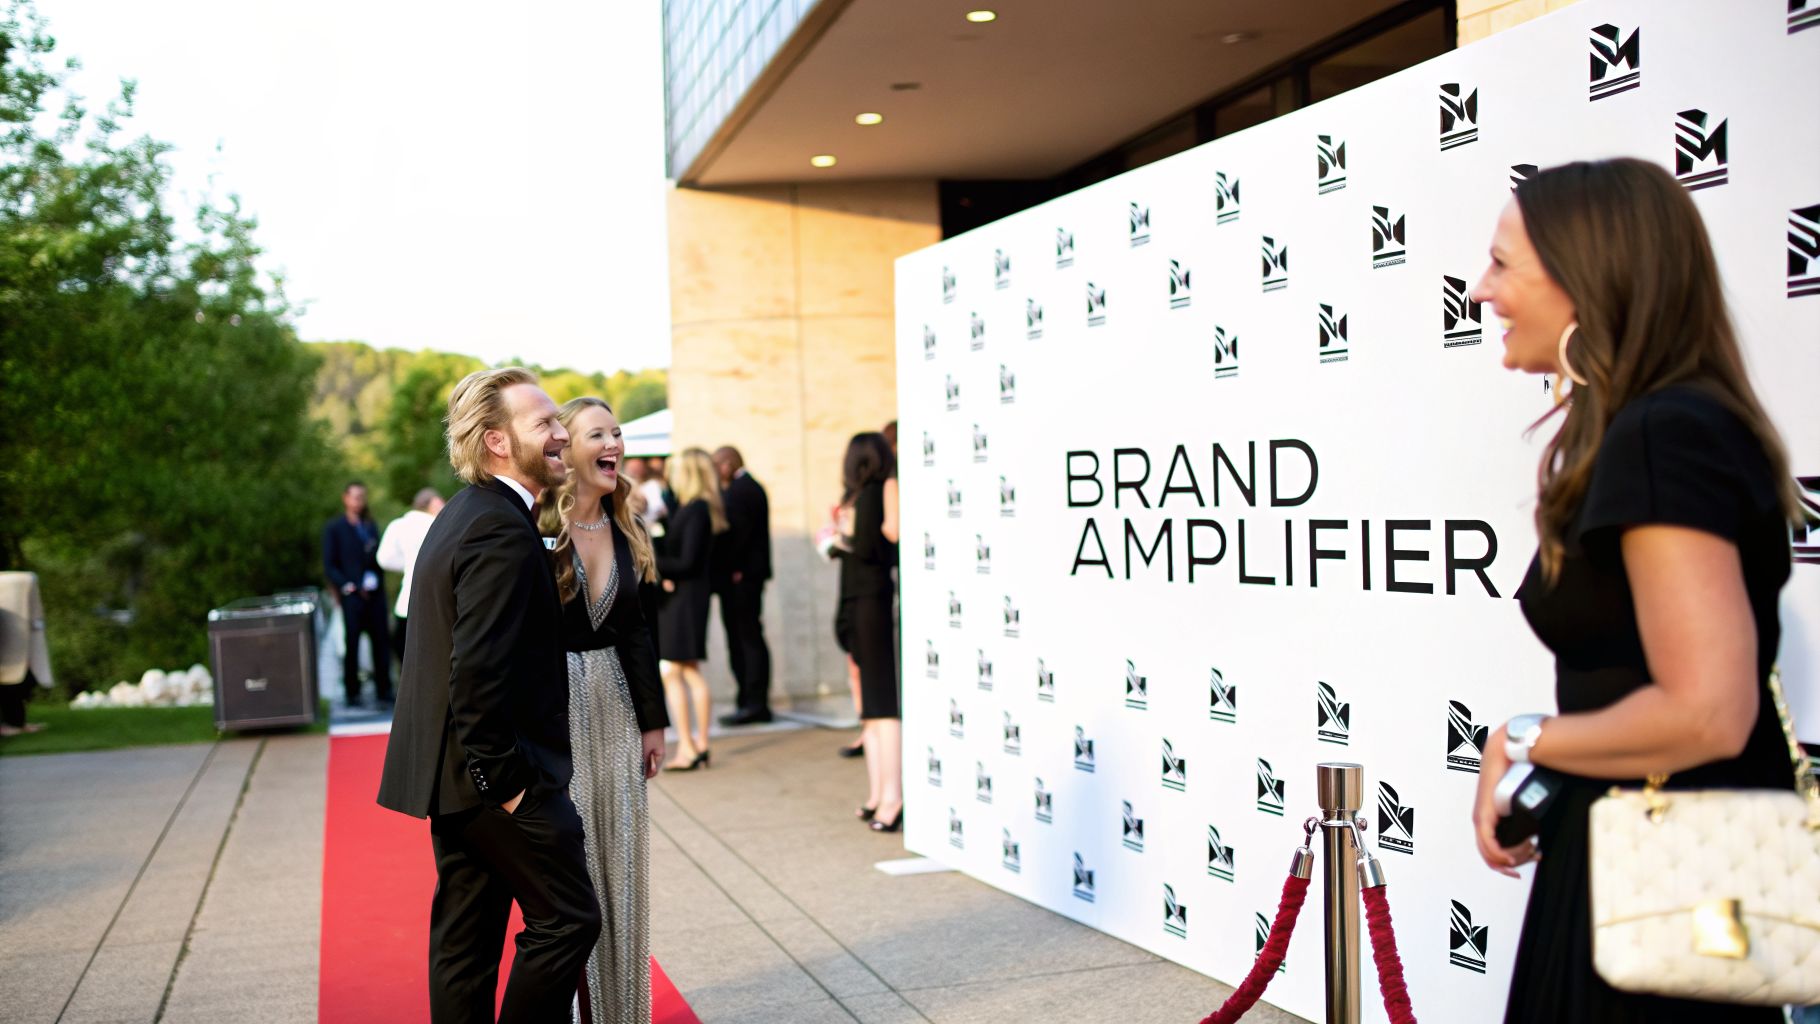
Imagine your next corporate gala. Instead of just mingling, guests are lining up for their moment in the spotlight, taking pictures against a professional, branded wall. This simple addition transforms a passive corner into an engaging, interactive experience. A step and repeat sign, also called a media wall or press backdrop, has one job: to get your brand seen.
The name comes from its straightforward design process: your logo is "stepped" and "repeated" in a grid pattern across the banner. This smart layout ensures that no matter where someone poses for a photo, your brand is right there in the shot, sharp and clear.
Why Your Event Needs a Brand Amplifier
The real power of step and repeat signs goes far beyond making your event look good. It’s about sparking organic marketing that keeps working long after the lights go down. When an attendee shares their photo online, your logo travels with it, reaching hundreds—or even thousands—of their friends and colleagues.
Suddenly, every guest becomes an unofficial brand ambassador. Think of it as a low-effort, high-impact marketing machine. One backdrop can generate a huge volume of user-generated content, all of it featuring your company's identity.
A step and repeat backdrop creates instant value in all sorts of scenarios:
- Corporate Galas and Award Ceremonies: It adds a touch of red-carpet professionalism and gives employees a designated spot to capture memories, building company pride. For example, a real estate firm celebrating its top sellers for the year can use a backdrop with the company logo to make every award photo a branding moment.
- Product Launches: A branded backdrop keeps the focus squarely on your new offering, creating a consistent visual story for all press and influencer photos. When a tech company launches a new gadget, the backdrop ensures the company brand is in every "unboxing" and first-look photo.
- Grand Openings: Attract foot traffic from day one and encourage social sharing to build immediate local buzz. A new restaurant can offer a free appetizer to guests who post a photo in front of their step and repeat, generating instant online reviews.
- Trade Show Booths: A high-quality backdrop makes your booth a destination, drawing people in and giving your sales team a natural conversation starter. It signals that your booth is a key player at the show.
More Than Just a Background
At the end of the day, a step and repeat does more than just fill an empty space. It creates a defined, official photo op that people are naturally drawn to. This simple act of setting up a photo area drives engagement and makes your brand an integral part of the event experience. It’s also a structured way to capture high-quality images for your own future marketing.
For a great example of how you can elevate the concept, check out the theatrical look of this Hadestown Step And Repeat with custom signature carnations.
A well-designed step and repeat backdrop is a marketing workhorse. It’s a one-time investment that pays dividends through continuous brand exposure on social platforms, creating an impressive ROI from a single event asset.
Choosing the Right Material for Your Backdrop
Choosing the material for your step and repeat sign is the single most important decision you'll make in this process. It dictates how your brand looks in photos, how easy the sign is to transport, and how many events it will last. This isn't a minor detail—it's a strategic choice that directly impacts your event's success.
The two workhorses of the industry are vinyl and fabric. Think of it like choosing an outfit: a rugged raincoat (vinyl) is perfect for a windy outdoor festival, while a sharp, tailored suit (fabric) is the only real choice for a formal indoor gala.
The Great Debate: Vinyl vs. Fabric
Matte vinyl has been the go-to for years because it's tough, budget-friendly, and a breeze to clean. Its durability makes it a solid pick for high-traffic events, especially outdoors where it might face spills or bad weather. The colors pop, and it can take a beating.
But vinyl has one major weakness: glare. Even the best "matte" finish can create a subtle sheen under the pop of a camera flash, washing out the very logos you want to showcase. For any event centered on photography, this is a critical flaw. You can get a better sense of how these materials are created in our guide on the large-format printing process.
Stretch fabric, on the other hand, is the premium choice for a flawless finish. Its non-reflective surface acts like a sponge for light, completely killing any camera glare. This guarantees every logo is sharp and readable in every photo, no matter how aggressive the lighting.
Actionable Insight: Our own analysis of over 500 event backdrops found that fabric cuts down photo glare by a staggering 73% compared to vinyl. That massive difference is what ensures you get crisp, shareable images that keep promoting your brand long after the event is over.
To make the choice even clearer, we've put together a head-to-head comparison of these two materials. This table breaks down the key features to help you match the right material to your specific event needs.
Vinyl vs Fabric Step and Repeat Signs
| Feature | Matte Vinyl | Stretch Fabric |
|---|---|---|
| Photo Finish | Prone to glare and hot spots from flash | Completely matte, non-reflective finish |
| Durability | High; waterproof and easy to clean | Good; can be machine washed if needed |
| Portability | Heavier and bulkier to transport | Lightweight and folds down compactly |
| Wrinkles | Can hold creases from being rolled | Wrinkle-resistant; tension pulls it smooth |
| Best For | Outdoor events, high-traffic areas | Red carpets, photo booths, trade shows |
| Cost | More budget-friendly | Premium investment |
Ultimately, fabric delivers a superior photographic result, while vinyl offers a more rugged, cost-effective solution for environments where perfect photos aren't the top priority.
Making the Right Choice: A Scenario-Based Approach
Instead of getting bogged down in specs, let's walk through a few real-world situations.
Scenario 1: The Annual Outdoor Charity 5K
- The Environment: A busy outdoor registration tent, with morning dew or the threat of rain and lots of people milling around.
- The Best Choice: Matte Vinyl. Its weather resistance and durability are essential here. Any mud or moisture wipes right off, and it will hold up to the chaos of a busy race day without you worrying about damage.
Scenario 2: The Indoor Red-Carpet Awards Gala
- The Environment: An elegant indoor venue crawling with professional photographers using flash. The goal is pristine photos for press releases and social media.
- The Best Choice: Stretch Fabric. Its glare-free surface is non-negotiable. Fabric ensures every photo is perfect, reinforcing a high-end, professional image without any distracting light flares.
Scenario 3: The Multi-City Trade Show Tour
- The Environment: Constant packing, shipping, setup, and teardown across multiple convention centers. Portability and a wrinkle-free look are critical.
- The Best choice: Stretch Fabric. It's much lighter than vinyl, which saves a ton on shipping costs and back pain. Plus, it's naturally wrinkle-resistant—any creases from transit usually disappear once it's stretched taut on the frame, making setup faster.
For those interested in the hands-on side of things, this guide on How to Make a Backdrop for Photos offers great context on handling different materials. The right choice always comes down to balancing your budget against the demands of your event and your brand standards.
Perfecting Your Step and Repeat Design Layout
The quality of a step and repeat sign is locked in long before it ever hits the printer. A great design is what turns a simple banner into a real-world marketing workhorse, ensuring your brand’s logo is the star of every single photo.
This is more than just scattering logos on a background; it’s a craft. You have to get the logo placement, sizing, and the rhythm of the pattern just right to avoid a look that’s cluttered or amateur. Nail these details, and your backdrop will command attention for all the right reasons.
The Non-Negotiable Rule of High-Resolution Logos
The single biggest mistake we see in backdrop design is the use of low-quality logo files. When a small, web-ready file like a .JPG or .PNG is blown up to fit a large banner, the result is a blurry, pixelated mess that makes your brand look unprofessional. Once it's printed, there’s no going back.
Actionable Insight: To prevent this disaster, always use vector logo files. This is non-negotiable. Vector formats like .AI (Adobe Illustrator), .EPS, or a high-resolution vector .PDF are mandatory. Unlike pixel-based images, vectors are built with math, allowing them to scale infinitely—from a business card to a billboard—with zero loss in sharpness.
Crafting a Balanced Repeat Pattern
The "repeat" in step and repeat is where the real strategy comes in. The mission is to create a seamless pattern where logos are always visible but never feel overwhelming. A design with logos packed too tightly looks chaotic and just doesn't photograph well.
There are two main patterns people use, but one is clearly better:
- Grid Layout: This is the simple approach, with logos aligned in straight rows and columns. It’s clean, but it almost guarantees that some logos will be hidden behind people’s heads.
- Staggered or Diamond Layout: This is the industry standard for a good reason. By offsetting each row, you create a diagonal pattern that makes sure a logo is always visible, no matter where people stand. It gives you the best odds for clear brand exposure in every shot.
If you’re working with multiple sponsors, it's vital to give each logo the same visual weight and space. Practical Tip: Keep the number of unique logos to a minimum—four or fewer is ideal—to keep the look clean and professional. When you need a spark of creativity, you can browse different sign design ideas to see what works for other brands.
Sizing and Spacing for Optimal Visibility
So, how big should the logos be? A solid rule of thumb is to size logos between 9 to 11 inches wide. This is large enough to be perfectly clear in photos without completely taking over the backdrop.
Just as important is the negative space—the blank area around each logo. Giving each logo room to "breathe" prevents the design from feeling cramped and makes the entire backdrop look more polished and aesthetically pleasing.
This mind map breaks down how material choices, a key decision you make before the design phase, will impact how your backdrop looks in photos.
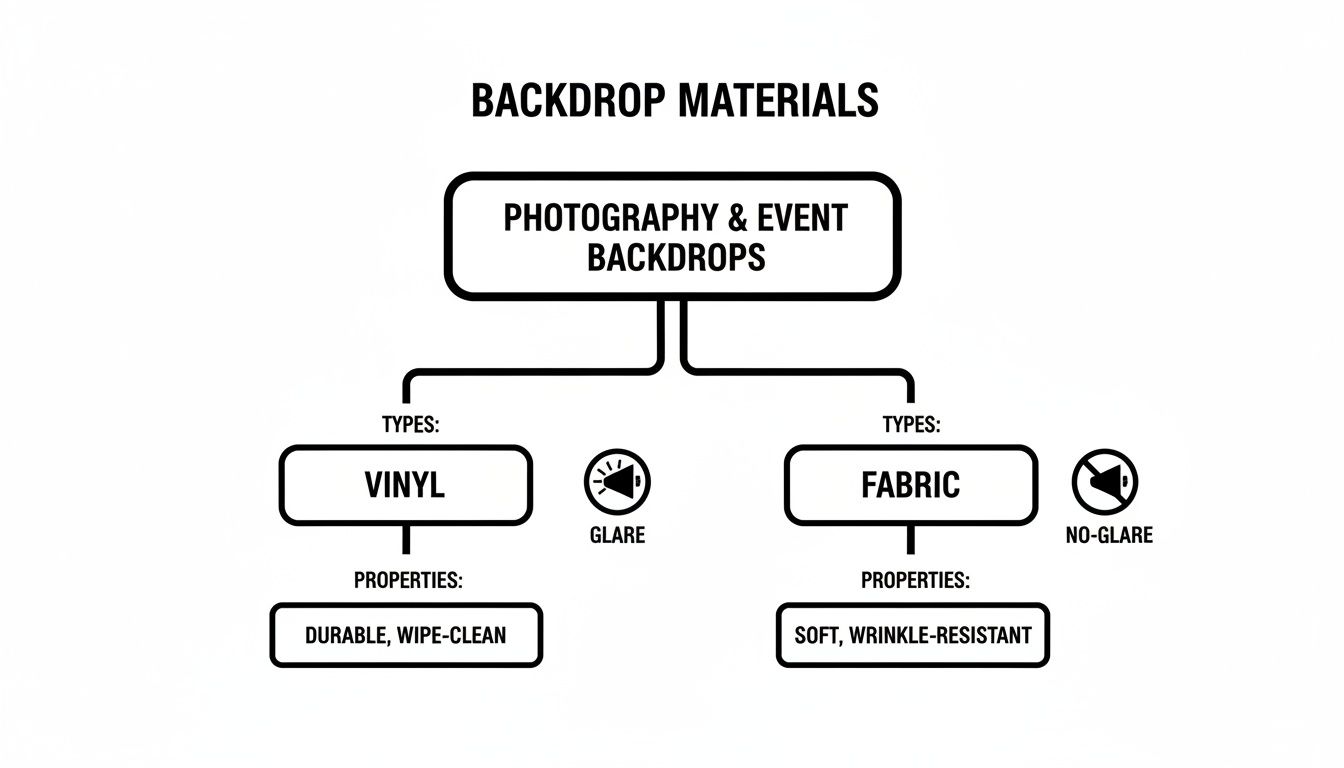
As you can see, it really boils down to a fundamental trade-off: vinyl is tough but prone to camera glare, while fabric delivers the glare-free finish that photographers love.
Color Palette and Background Choices
Your colors should strengthen your brand identity, not fight against it. A simple color palette is almost always the winning choice. Using one or two of your primary brand colors for the logos against a neutral background creates a powerful, uncluttered visual.
When it comes to the background itself, you can't go wrong with one of these three classics:
- White: A crisp, clean white background is the most popular option by far. It makes colorful logos pop and creates a bright, professional look that fits nearly any event.
- Black or Dark Gray: For a more dramatic, upscale vibe, a black or dark background works wonders, especially if your logos are light-colored or have a metallic sheen.
- Branded Color: Using a solid brand color for the entire background can create a powerful, immersive experience, but you have to make sure your logos still have enough contrast to stand out.
By focusing on these core design pillars—high-resolution files, a balanced staggered layout, smart sizing, and a simple color scheme—you can approve your print file with total confidence.
How to Select the Right Size and Hardware
A stunning **step and repeat sign** is only half the battle. The other half—the part that makes your brand look truly polished and professional—is the size of your backdrop and the hardware holding it all together. A wobbly, undersized setup can instantly make a great design look cheap, undermining your brand at the worst possible moment.Think of the hardware as the frame for a masterpiece. A cheap, flimsy frame does a disservice to the art, and a low-quality stand will fail to present your banner with the stability and tautness it deserves. Getting these details right is what separates an amateur look from a professional brand experience.
Matching Banner Size to Your Event Needs
The dimensions of your step and repeat banner have a direct impact on its effectiveness. If it’s too short or too narrow, you end up with awkward photos where the venue’s distracting background—think exit signs and ceiling fixtures—creeps into the shot.
A solid rule of thumb is to always go with a banner that’s at least 8 feet tall. This height is the sweet spot that ensures most cameras will capture nothing but your branded backdrop, creating a clean and immersive photo opportunity.
Here’s a quick guide to picking the right width based on your expected photo groups:
- 8' W x 8' H: This is the industry workhorse. It’s the perfect size for photos of 2-4 people, making it a versatile choice for everything from trade show booths to corporate parties.
- 10' W x 8' H: If you expect people to gather for larger group shots, upgrading to a 10-foot width is a smart move. It gives you enough room to comfortably fit 4-6 people without cutting anyone off at the edges.
- 12' W x 8' H (or wider): For red carpets, awards ceremonies, or any event where you want to make a grand statement, go big. A 12-foot banner (or even wider) creates a truly impressive presence and easily handles large team photos.
Understanding Your Hardware Options
The stand is the unsung hero of your display; it’s what holds the entire presentation together. While it stays in the background, its quality is directly tied to your banner’s stability and appearance. Your choice generally comes down to a standard or a premium stand.
A standard stand is an adjustable, lightweight frame made with telescopic poles. It's a great, budget-friendly option for one-time events or light indoor use where it’s unlikely to get bumped. The trade-off is that its lighter build can feel less secure in busy, high-traffic environments.
A premium stand, on the other hand, is engineered for the long haul. These frames are built with thicker poles, heavy-duty steel bases, and rock-solid connection points designed for repeat use and maximum stability.
Actionable Insight: The real advantage of a premium stand is its unflinching stability. It's non-negotiable for outdoor events or any high-traffic indoor area where the display could get jostled. A sturdier frame keeps your banner perfectly taut and prevents tipping, safeguarding your professional image all event long.
If you want to dig deeper into the nuts and bolts of displaying banners, our guide on how to hang banners effectively covers more ground.
Practical Features to Look For
When you're comparing stands, a few key features make all the difference in setup, transport, and overall usability.
Key Hardware Features:
- Telescopic Poles: This is a must-have. Adjustable poles give you the freedom to change the frame's height and width, so you can use different-sized banners or adapt to whatever space a venue gives you.
- Sturdy Base Plates: Look for stands with wide, heavy steel bases. This is what gives your display its anchor, preventing a large banner from swaying or toppling over.
- Tool-Free Assembly: Most modern stands are designed for fast, tool-free setup. The poles slide and lock into place, which means one or two people can have the full frame assembled in just a few minutes.
- Included Carrying Case: Don't overlook this. A durable case is essential for protecting your hardware investment during storage and transport, keeping all the pieces organized and safe from damage.
By paying close attention to both the banner dimensions and the stand’s quality, you ensure your step and repeat is more than just a backdrop—it's a stable, reliable, and impressive brand asset.
Setup and Maintenance That Protects Your Investment
Your step and repeat sign is a serious marketing tool, and protecting that investment is what separates a one-time wonder from a long-term asset. A shaky setup or careless storage can instantly make a premium backdrop look sloppy and unprofessional. The good news is, keeping it looking sharp is simple.
Think of your backdrop like a tailored suit. You wouldn't just crumple it up and toss it in a corner. A little care ensures it delivers a polished, consistent brand image every single time you use it.
Assembling Your Banner for a Flawless Look
A standard telescopic stand is a tool-free job that shouldn't take more than 10 minutes once you know the ropes. The whole game is creating a perfectly smooth, taut surface that makes your logos pop. While it might look intimidating, the process is straightforward. For tips on handling more complex or large-scale signage, our guide on commercial sign installation is a great resource.
Here’s how to get a perfect setup, every time:
- Build the Frame: Lay out all your parts on a clean, flat surface. Connect the base plates with the bottom horizontal pole, then pop in the two vertical side poles.
- Attach the Banner: Unroll your banner and slide the top horizontal pole through its pole pocket. Attach this to the tops of the vertical poles, then repeat with the bottom pole and pocket.
- Create Tension: This is the most important part. Raise the vertical poles to stretch the banner upwards, pulling out any slack. Then, expand the horizontal poles to smooth out any remaining sagging.
Actionable Insight: The goal is to get drum-like tension across the whole surface. A perfectly tight banner doesn't just look professional—it actively smooths out the minor wrinkles that might have formed in storage.
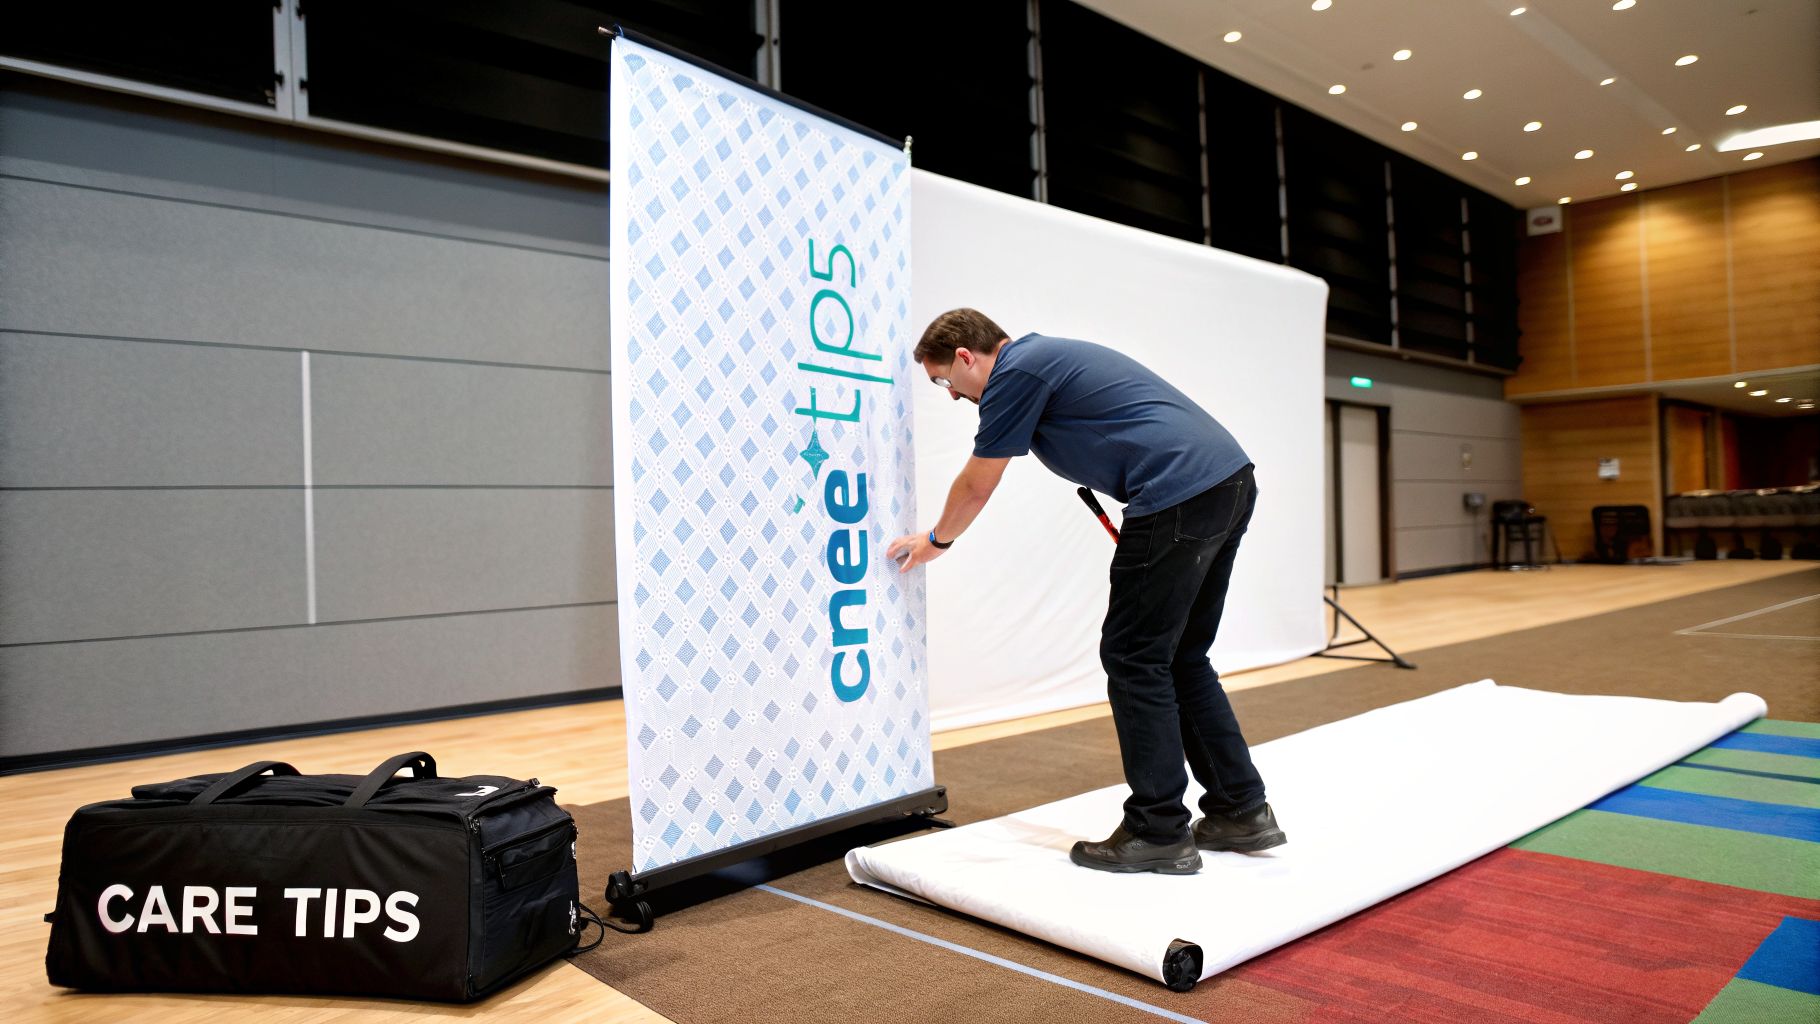
Smart Care and Maintenance Tips
How you clean and store your backdrop directly affects how long it lasts and how good it looks. The right method comes down to your material, as vinyl and fabric need different care to stay in prime condition.
Cleaning Your Step and Repeat Banner
Keeping your backdrop pristine is easy. Just match your cleaning method to the material.
- For Matte Vinyl: Vinyl is as low-maintenance as it gets. Just wipe it down with a soft cloth using a little mild soap and water. Stay away from abrasive cleaners that could scratch the print.
- For Stretch Fabric: Most quality fabric backdrops are machine washable. Run it on a gentle cycle with cold water and a mild detergent. You can either tumble dry on low or, for a guaranteed wrinkle-free finish, reattach the damp banner to its frame and let it air-dry.
Storing Your Banner to Prevent Damage
Bad storage is the #1 killer of step and repeat signs. Folding a banner, especially vinyl, creates permanent creases that are almost impossible to remove.
Practical Tip: You should always roll your banner for storage—never fold it. With vinyl, roll it so the graphics face outward; this protects the printed surface from getting scratched. Fabric can be rolled or folded loosely. Using the carrying case it came in is always the best bet to protect it from dust, moisture, and dings between events.
Making a Smart Purchase: What to Expect
Buying a step and repeat sign is a smart investment, but understanding the costs and the ordering process is what turns a good purchase into a great one. The final price isn't just a number pulled out of thin air; it’s a direct reflection of the size, material, and hardware you choose for your specific needs.
Think of it like buying a company truck. A basic model gets you from A to B, but a premium version offers better performance, durability, and a more polished image. The same logic applies here—your choices directly shape your backdrop's impact and how long it will last.
Deconstructing the Costs of a Step and Repeat Sign
The final price tag on your banner is a blend of a few key decisions. Each one plays a part in the total investment.
The Main Cost Drivers:
- Material Choice: As we covered, a premium, glare-free stretch fabric will cost more upfront than the workhorse matte vinyl.
- Banner Size: This one’s simple—a larger banner uses more material and ink. An 8'x10' backdrop will naturally have a higher price than an 8'x8' one.
- Hardware Quality: A standard, lightweight stand is your most budget-friendly route. A heavy-duty premium stand, built for stability and frequent use, is a larger investment designed to last.
- Design Services: If you already have a print-ready vector file, you’ll avoid design fees. If you need our team to create the layout from scratch or fix low-resolution logos, that service will be part of the cost.
This has become a cornerstone investment for businesses looking to make a splash at events. In fact, companies often budget between $500 to $1,200 per backdrop for major trade shows and conferences. This spending reflects a proven return, often seen in the explosion of social media shares and brand visibility. For more, check out these insights on event marketing investments from stepandrepeatlasvegas.com.
Ultimately, the cost of signage for your business is always a balance between your budget and the impact you want to make.
Your Step-by-Step Ordering Checklist
To make sure the ordering process is smooth and mistake-free, a good checklist is your best friend. It turns what could be a confusing task into a series of simple, manageable steps, so you never miss a critical detail.
Actionable Insight: Following a clear checklist is the secret to a stress-free purchase. It ensures every logistical, technical, and design detail is confirmed, eliminating guesswork and preventing costly mistakes before your sign ever goes to print.
Use this roadmap to guide your order from start to finish.
Confirm Your Event Logistics First
- What's the event date? Give yourself a buffer. Order at least two weeks out to avoid any rush fees.
- Where will it be set up? Measure the physical space at the venue to know the maximum size that will fit.
- What’s the lighting like? Will there be professional flash photography? This is the key question for choosing your material.
Finalize Your Design Assets
- Gather Your Logos: Get all sponsor and company logos in a high-resolution vector format (.AI, .EPS, or vector .PDF). JPEGs won't cut it.
- Define Your Layout: Decide between a staggered or a simple grid pattern. We almost always recommend staggered for the best photo results.
- Choose Your Colors: Lock in your background color (white is standard) and confirm the logo colors.
Select Your Physical Components
- Choose Your Material: Based on the lighting and your budget, select either matte vinyl or stretch fabric.
- Pick Your Size: Choose dimensions (like 8'x8' or 8'x10') that fit your venue and the size of groups you expect to photograph.
- Select Your Stand: Go with a standard stand for one-off events or a premium stand if you plan on using it again and again.
Review and Approve the Final Proof
- Check Every Detail: Carefully review the digital proof your sign provider sends. Check every spelling and every logo.
- Confirm Layout and Colors: Make sure the logo placement and colors are exactly what you asked for.
- Give Final Approval: Once you are 100% satisfied, sign off on the proof. This is the green light for production to start.
By walking through this checklist, you cover all your bases. You’re not just buying a banner; you're commissioning a piece of custom marketing equipment. This structured approach ensures the final product is exactly what you envisioned.
Your Step and Repeat Questions, Answered
When you're getting ready to order a step and repeat sign, a few practical questions always come up. We've put together answers to the most common ones we hear from clients to help you get it right the first time.
How Far in Advance Should I Order My Sign?
Our advice? Give yourself breathing room. We strongly recommend ordering your backdrop at least two weeks before your event. This buffer is perfect for handling the design process, proof approvals, printing, and shipping without a last-minute scramble or expensive rush fees.
If you have a highly custom order or complex shipping logistics, playing it safe is always the best move. Pushing your timeline out to three or four weeks will guarantee a completely stress-free process from start to finish.
Can I Reuse My Backdrop for Different Events?
Absolutely. In fact, getting years of use out of one backdrop is one of the smartest reasons to invest in a quality one. The trick is to design it for versatility. Stick with a timeless pattern of your logo and skip any event-specific dates, hashtags, or themes.
This makes your banner a workhorse you can pull out again and again for:
- Annual trade shows
- Corporate holiday parties
- New employee onboarding events
- Community sponsorship functions
Fabric banners are especially great for long-term use. Many are durable enough to be machine washed, making them a cost-effective and sustainable tool for your brand.
What Is the Best File Format for My Logos?
This is non-negotiable for a professional result: vector files are essential. To get those razor-sharp logos, you must provide your artwork in a true vector format like .AI (Adobe Illustrator), .EPS, or a vector-based .PDF.
Actionable Insight: Think of it this way: standard image files like .JPG or .PNG are built from a fixed grid of pixels. When you blow them up, they get blurry and jagged. Vector graphics, on the other hand, are built from mathematical paths. This is the secret sauce that lets us scale your logo to the size of a massive backdrop with zero loss in quality. It stays perfectly crisp.
How Do I Prevent Wrinkles and Glare?
Getting a flawless look on camera comes down to two things: setup and material. For a perfectly smooth, taut appearance, make sure you pull the banner tight on its stand using the pole pockets or grommets. And when the event is over, always roll your banner—never fold it. Folding creates creases that can become permanent.
As for preventing glare from camera flashes, the best defense is choosing the right material from the start. A matte-finish vinyl is a decent choice, but a stretch fabric material is the undisputed champion. Fabric naturally absorbs light, which eliminates those distracting hot spots and guarantees your photos look polished every single time.
Ready to create a flawless backdrop for your next event? The experts at On Display Signs, Inc. are here to guide you through every step, from design to delivery. Get a free quote today and make your brand the star of the show.
