You’re usually looking at cut out poster board because a flat sign isn’t doing enough.
The message may be right. The branding may be right. The location may even be right. But the display still sits there like wallpaper. In retail, that means shoppers keep walking. In a church lobby, people miss the event promotion. At a trade show, your booth blends into a line of other booths that all look equally polished and equally forgettable.
That’s where a shaped display earns its keep. A well-made cutout gives a space a visual anchor. It creates depth, directs attention, and gives people something to approach instead of something to pass. In commercial environments, that difference matters.
Most online advice treats poster board cutouts like a weekend craft. That’s fine for a birthday party. It’s not fine when the display has to hold up in a store entrance, travel to multiple events, match brand colors, and still look clean after repeated handling. Commercial use changes the conversation. Material choice, image quality, cut precision, base design, shipping, and installation all affect whether the final piece looks sharp or looks improvised.
A professional cut out poster board display isn’t just printed and trimmed. It’s specified for a job. That includes where it will sit, how long it needs to last, who will handle it, what lighting it will live under, and whether it needs to ship flat, stand freely, or mount to a wall.
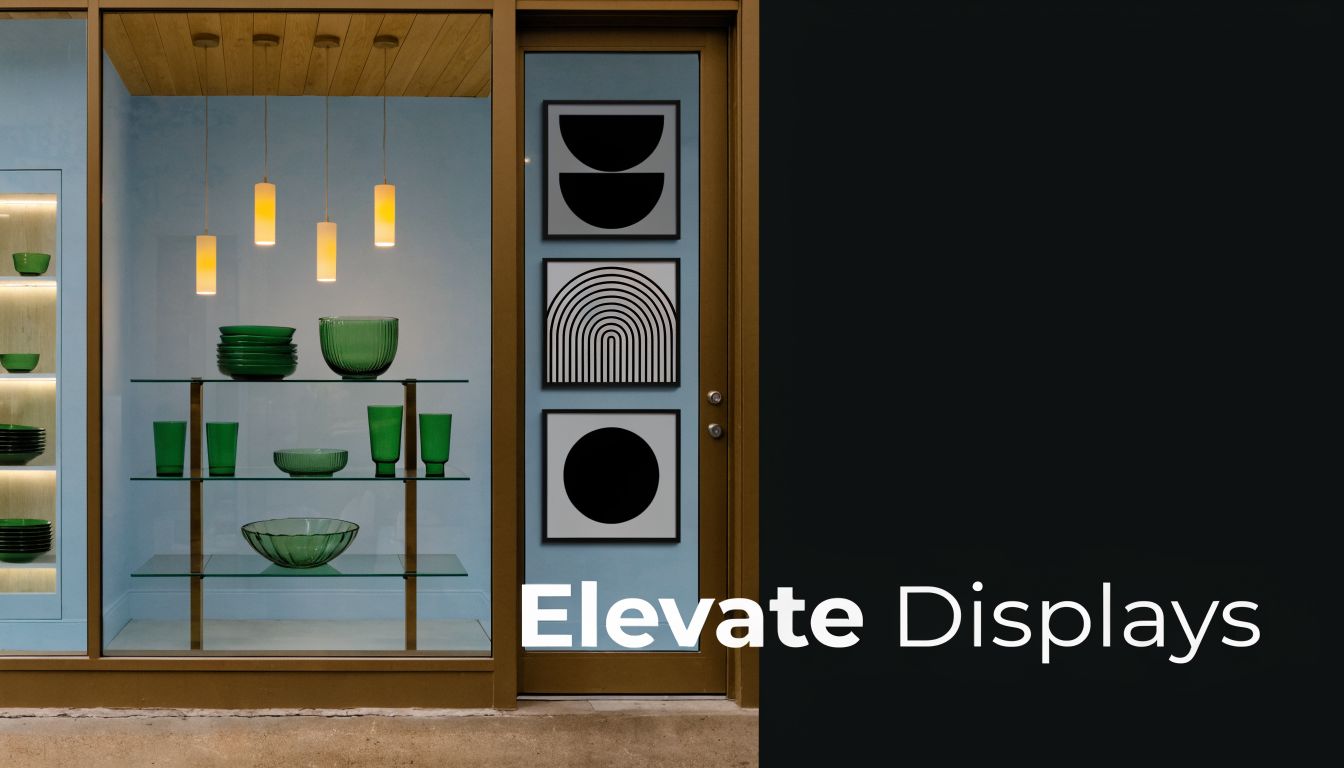
Beyond the Flat Poster
A business owner usually notices the problem before they know the solution.
The front window looks clean, but not memorable. The lobby has the right information, but no focal point. The promotion is visible, yet nobody stops for it. That’s common in spaces that rely only on wall signs, counter cards, or standard posters. They communicate, but they don’t always pull people in.
Where dimensional displays change the room
A shaped display works because it breaks the visual pattern.
In a retail shop, that might be a life-sized product character near the entrance. In a school or church, it might be a themed standee that turns a blank hallway into a photo spot. In a showroom, it might be a cutout that frames a featured item and gives the campaign a physical presence.
That’s different from printing larger alone. Size alone doesn’t create impact. Shape, silhouette, and placement do.
A cut out poster board display can also solve a practical problem. It gives staff a movable promotional element that doesn’t require a permanent install. You can reposition it for an event, a seasonal push, or a product launch without changing the entire sign package.
Practical rule: If the message matters but the space still feels static, add form, not just more copy.
Good cutouts behave like signage, not props
The best commercial cutouts don’t feel homemade. They feel integrated.
That means the graphic style matches the rest of the brand. The shape is intentional. The stand is stable. The finish fits the environment. In a polished retail setting, a rough edge or flimsy base stands out immediately, and not in a good way.
Teams planning promotional environments often pair cutouts with other creative signs and graphics because the cutout acts as the attention-getter while surrounding signs handle the supporting information. That’s a strong combination. One element stops people. The others answer their questions.
A flat poster says something. A good cutout starts an interaction.
What Exactly Is a Professional Cut Out Display
A professional cut out poster board display is a custom-printed rigid sign that’s cut to shape and built to hold its form in a real commercial setting.
That sounds simple, but the difference between a professional display and a hobby version is substantial. One is engineered to present a brand cleanly. The other is usually made to get through a short event.
It’s a signage product, not a craft project
At the basic level, a cutout combines three things:
- A high-resolution graphic that can scale without falling apart
- A rigid substrate that can stand, mount, or travel
- A precision cut path that defines the final silhouette
That combination gives the display a sculptural effect without turning it into a heavy fabricated sign. It’s still relatively lightweight, but it occupies space differently than a rectangle on a wall.
A useful comparison is foam core presentation work. If you’ve handled retail boards or mounted graphics before, the concept is familiar, though a cutout pushes it further by shaping the perimeter and often adding structural support. If you need background on board-based sign substrates, this overview of what foam core board is helps frame the category.
Why businesses have used cutouts for decades
This format isn’t new. It has a long advertising history because it works in public spaces.
Cardboard cutouts, often made from cut out poster board, first emerged in the early 20th century as an advertising tool. Their use expanded dramatically in the 1950s and 1960s, when U.S. advertising spend grew from $5.7 billion in 1950 to $11.2 billion by 1960, according to historical marketing data cited in this overview of the evolution of cardboard cutouts.
That history matters for one reason. Businesses kept using them because they attracted attention at the point of decision. Theater lobbies, retail floors, and event spaces all benefit from signs that people notice before they read.
What makes one commercial grade
A commercial-grade cutout has to do more than look good in a mockup. It has to survive handling, setup, and public use.
That usually means the display needs:
- Stable support so it doesn’t lean or collapse
- Clean edges that hold up under close viewing
- Reliable print quality so brand colors and facial features reproduce well
- A material fit for the environment, whether indoor or outdoor
- Shipping practicality if the piece is going to multiple sites
A good professional cutout sits in the same category as other branded fixtures. It isn’t decoration alone. It’s part of the communication system in the space.
Common business uses
Commercial clients tend to use cutouts for a short list of repeatable applications:
| Use case | Why it works |
|---|---|
| Retail promotions | Pulls attention at entrances, endcaps, and featured product zones |
| Trade show booths | Adds silhouette, height, and photo appeal without heavy build-outs |
| Church and school events | Creates themed environments and welcome moments |
| Corporate activations | Supports launches, internal events, and branded photo areas |
| Directional or informational displays | Makes wayfinding more visible when shape supports the message |
The strongest results come when the cutout has a job. It should welcome, direct, highlight, or reinforce. If it does none of those, it usually turns into background.
Choosing the Right Materials and Thickness
Most cutout problems are material problems.
The artwork may be solid. The concept may be strong. But if the board is too thin, too soft, or wrong for the environment, the display will curl, crease, sag, or fail early. That’s why substrate selection should happen before final design approval, not after.
Start with the environment
Indoor short-term use gives you more flexibility. Heavy traffic, repeated setup, or outdoor placement does not.
For commercial cut out poster board displays, 4 to 5 mm rigid boards offer stronger resistance to bending, especially for displays over 5 feet tall, according to this material guide on cardboard cutout standees. The same source notes that double-wall corrugation increases flexural modulus by 40 to 60 percent, enabling unsupported heights up to 6 to 7 ft in the right freestanding setup. For outdoor use, Coroplast offers 5x water resistance and strong UV stability.
Material choices that make sense in practice
Here’s the practical breakdown buyers usually need.
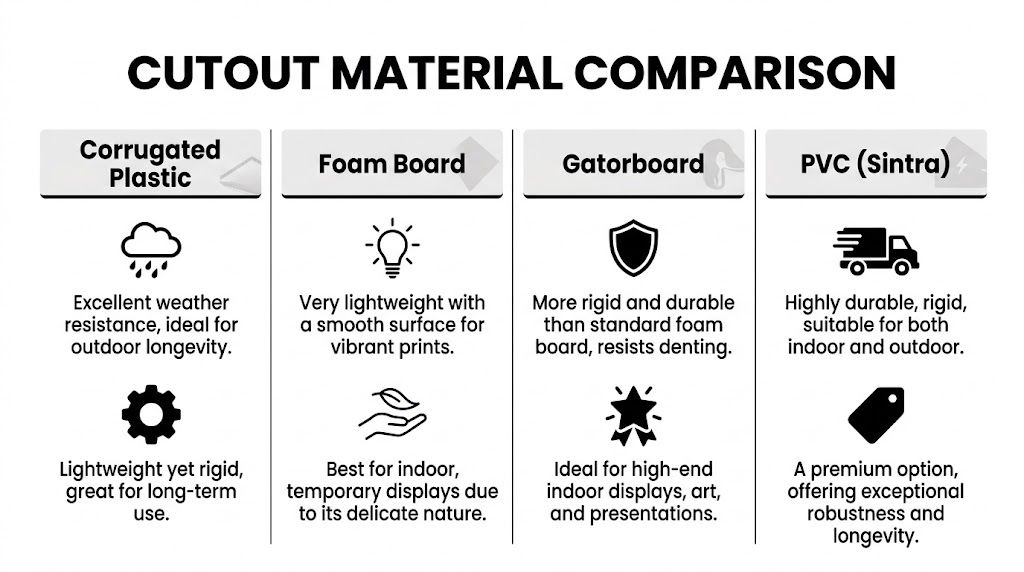
Foam board
Foam board presents well indoors. It has a smooth face, prints cleanly, and stays easy to carry.
It’s a reasonable fit for short-duration indoor promotions, conference use, internal presentations, or displays that won’t get bumped much. Its weakness is edge damage and surface denting. If staff will move it often or if customers can brush past it, foam board starts to show wear quickly.
Rigid corrugated board
Rigid corrugated board often makes the most sense for standard standees.
It balances weight, cost, and stiffness better than many low-end alternatives. When clients need a life-sized indoor cutout that can stand in a store, a lobby, or a booth, this is often the practical middle ground. The key is not choosing it too thin.
Corrugated plastic
Corrugated plastic is the better answer when moisture, repeated use, or tougher conditions are in play.
It’s a smart choice for storefront use, temporary exterior promotions, covered outdoor entries, and projects that may need to travel. It doesn’t behave like cheap cardboard when humidity becomes a factor.
A simple selection table
| Material | Best use | Watch out for |
|---|---|---|
| Foam board | Short-term indoor display | Dents and edge damage |
| Rigid corrugated board | Standard indoor standees | Thin boards can bend |
| Corrugated plastic | Outdoor or repeated-use display | Different surface feel than paper-faced boards |
| Premium rigid boards like Gatorboard or PVC | High-end or longer-term display | Higher cost and heavier handling |
If you’re comparing broader substrate options for a sign program, this sign board material guide is a helpful starting point: https://www.ondisplaysigns.com/sign-board-material/
Thickness is not a minor detail
Buyers often focus on graphic design first. In fabrication, thickness often decides whether the display feels sturdy or disposable.
A tall standee on a thin board tends to flex at the narrow points, especially around ankles, hands, corners, or top-heavy shapes. A stronger board reduces that problem. So does designing the silhouette with support in mind.
Use these rules:
- For tall indoor standees: Lean toward more rigid boards, especially once the display gets above average counter height.
- For high-traffic areas: Choose a board that resists edge crush and base fatigue.
- For repeated setup: Avoid the cheapest option. Every trip in and out of storage adds wear.
- For outdoor exposure: Move away from paper-based thinking and toward weather-tolerant substrates.
The cheapest board rarely stays cheap once you replace it, reprint it, or apologize for it.
What usually doesn’t work
These are the common missteps:
- Choosing by price alone: That’s how a lobby display ends up looking tired after light use.
- Using indoor board outdoors: Moisture and sunlight expose bad assumptions fast.
- Ignoring the base: A strong face graphic won’t save a weak freestanding support.
- Overcomplicating the shape: Fine projections and narrow cut points increase vulnerability.
Material selection is where durability starts. If that decision is wrong, the rest of the project has to compensate.
Understanding Printing and Finishing Options
Most buyers see the final shape and assume the fabrication is straightforward. It isn’t difficult to understand, but a few production terms matter because they affect both look and cost.
The two terms that clear up most confusion are dieline and cut type.
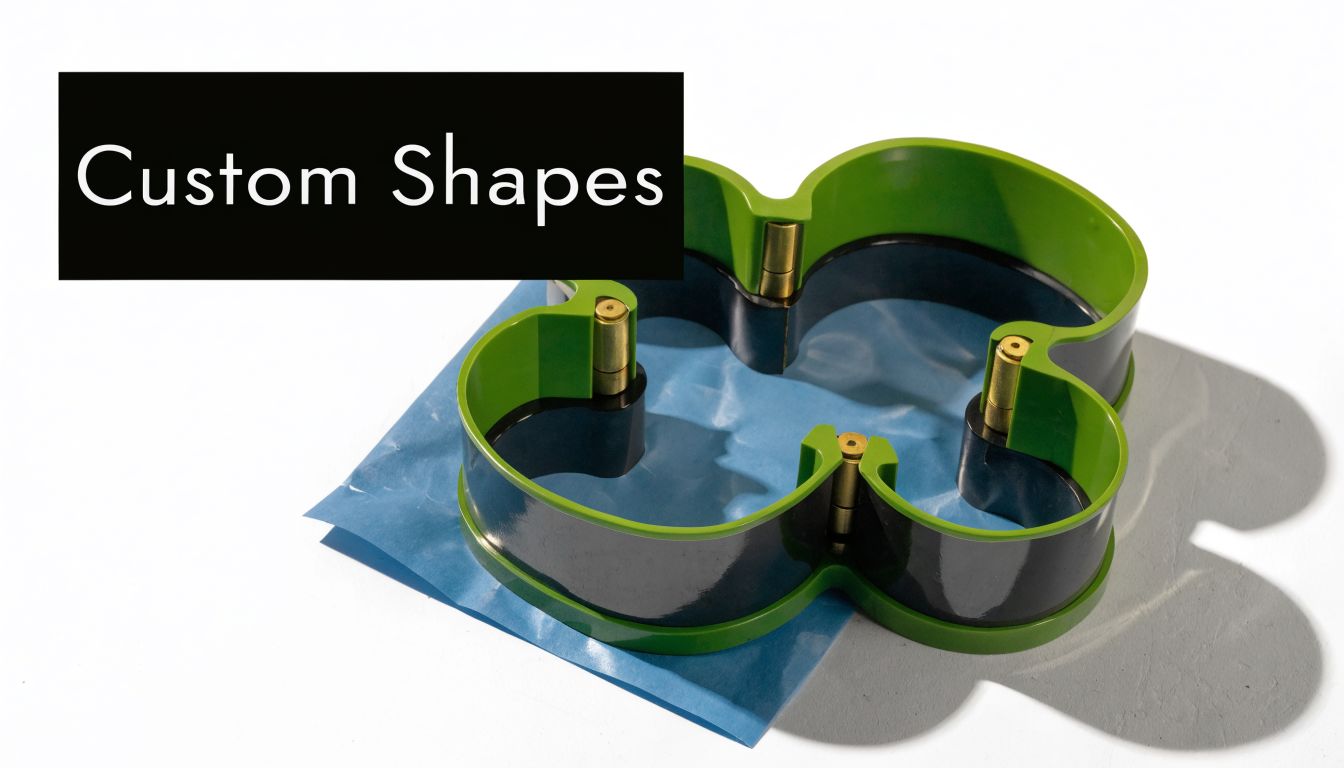
The dieline is the cutting map
A dieline is the outline that tells production where the final shape ends.
The process resembles a cookie cutter path applied to a printed board. The artwork shows what you see. The dieline tells the machine what to remove. If the art is strong but the dieline is sloppy, the final piece still looks off.
Experienced file prep matters. Hair, fingers, product handles, and tight corners all need judgment. A cut path that follows every tiny contour may look impressive on screen and become fragile in the world. A smarter dieline simplifies weak points while preserving the visual effect.
For businesses that already work with mounted graphics, posters, or display boards, the production logic is similar to other large format printing projects. The file has to be built for output, not just for digital review.
Full cut and kiss-cut are not the same thing
These terms get mixed up constantly.
A full cut goes all the way through the material. That’s what creates a standalone shaped display or a separate freestanding piece.
A kiss-cut cuts only the top layer. That’s more common for decals, label-style pieces, or sheet-based applications where you want the graphic shape without cutting through the backing.
For cut out poster board standees, you’re usually talking about full-cut production. If someone requests a cutout and means a peel-and-apply shape, that’s a different product category and should be clarified early.
Printing method affects look and durability
Rigid cutouts are commonly produced with direct-to-surface UV printing.
That matters because UV printing bonds the image onto rigid materials in a way that supports commercial handling and strong color. It also allows direct printing onto boards that will later be routed to shape.
If your team is comparing display types across mounted graphics, posters, and wall art, this overview of photo canvas printing is useful for understanding how substrate choice changes visual finish. Canvas gives texture and a decorative feel. A cutout board gives shape, edge definition, and structural utility.
Finishing choices that improve the result
Finishing often gets treated like an afterthought. It shouldn’t.
A cutout’s finish includes more than the print. It includes edge cleanliness, base attachment, back support, mounting hardware, and packaging approach. Those choices affect setup time and longevity.
Use this checklist during approval:
- Check the edge logic: Rounded or simplified contours often hold up better than sharp, delicate points.
- Confirm support method: Easel back, rear brace, wall mount, or suspended install should be settled before fabrication.
- Review the final silhouette at full scale: A shape that works on screen can feel awkward once it stands in a room.
- Plan for packing: Multi-site or repeat-use projects need a shipping method that matches the material and cut profile.
This short video helps visualize how shape-based display production comes together in practice:
What to ask before approving production
Before the file goes live, ask these questions:
- Will the shape create weak points in handling?
- Is the support hidden well enough to keep the display clean from the front?
- Does the print surface fit the setting, polished retail or rugged event use?
- Can the piece ship and store without damaging the edges?
- Does the final cut path improve the art, or fight it?
Those questions prevent most expensive revisions.
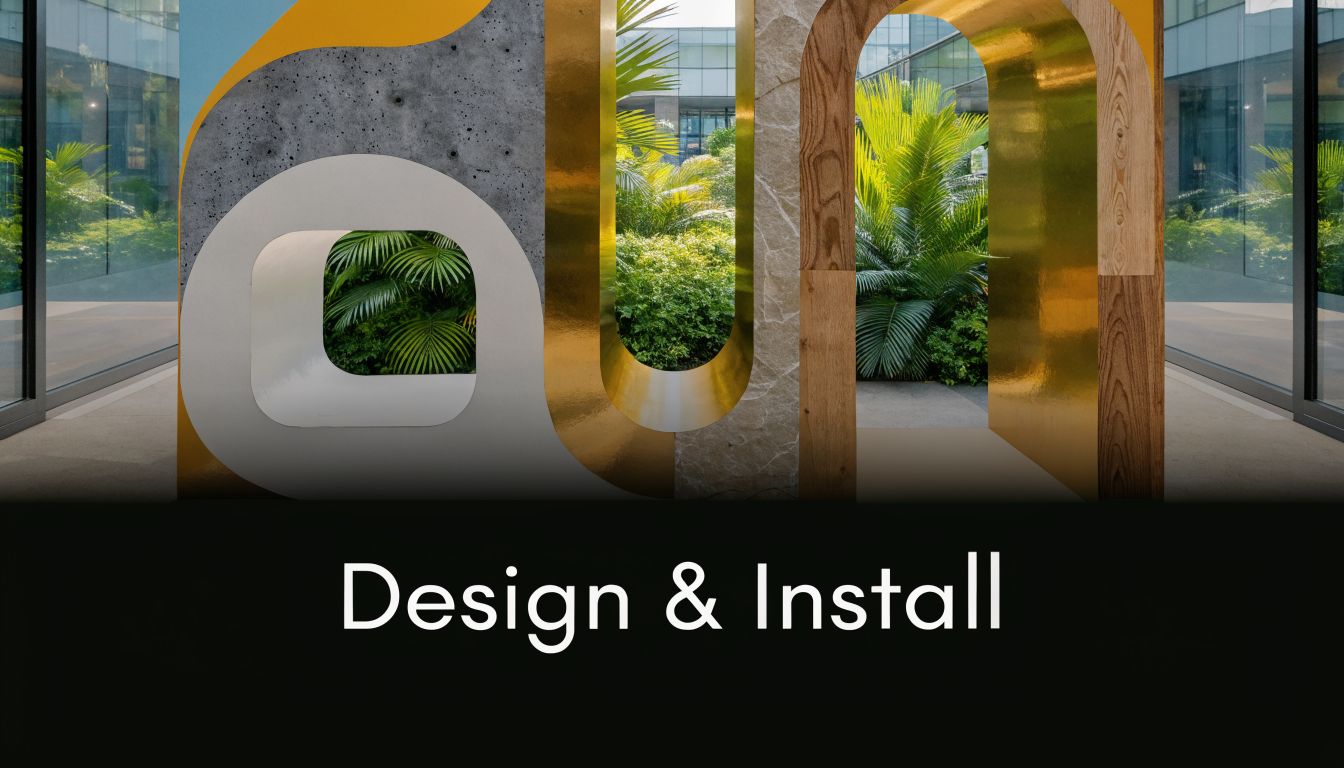
Designing and Installing for Maximum Impact
A cutout can be produced perfectly and still underperform if the design is weak or the install is careless.
Commercial displays succeed when the graphic, shape, and placement all support the same goal. That may be stopping foot traffic, creating a photo moment, reinforcing a campaign, or directing people through a space.
Start with image quality, not hope
Large cutouts expose every flaw in the source file.
For a standard 6 ft cardboard cutout standee, the minimum input image height should be 2200 pixels at 300 DPI, according to this image guide for large format cutout printing. The same source warns that files below 1500 pixels can produce moiré patterns and softness.
That requirement catches people off guard. A phone image that looks fine on a laptop can break apart once printed at life size. Faces lose detail first. Edges get soft. Textural areas become muddy.
Design choices that hold up in the field
A strong cutout design usually has restraint.
That means a clear silhouette, enough contrast to read from distance, and a pose or shape that makes sense from the main viewing angle. It also means understanding where the support lands. If the base interrupts a key part of the graphic, the whole piece feels compromised.
Design for distance first
Many commercial cutouts are first seen from across a room.
If the silhouette doesn’t read fast, the display loses a lot of its value. Large hair details, busy props, and low-contrast edges may look nice in a proof and disappear in the actual environment.
Protect the vulnerable areas
Hands, thin product edges, narrow legs, and isolated corners are common failure points.
Sometimes the best design move is to slightly widen or connect these areas so the final piece survives setup and handling. Good fabrication teams do this subtly. The viewer notices the overall shape, not the technical compromise.
Clean shape beats perfect tracing. A display has to survive the install before it can sell anything.
Installation method changes the result
The right install depends on where the display will live.
A lobby standee often needs a freestanding support. A branded wall moment may work better mounted slightly off the wall for dimension. Some event environments benefit from suspended pieces, especially when floor space is tight.
If you’re mounting a shaped board to a wall and want it to feel intentional rather than pinned up, standoff wall mount hardware can create a cleaner architectural presentation.
Placement mistakes to avoid
A good cutout can disappear if it’s installed badly.
Watch for these issues:
- Crowding the display: If shelves, furniture, or other signs block the shape, the impact drops.
- Bad lighting: Overhead glare can flatten the print or create harsh shadows across faces.
- Unstable floor placement: Entry mats, uneven flooring, and swinging doors create movement problems.
- Ignoring photo angles: If people will take pictures with the cutout, leave enough room around it.
A practical install sequence
For most commercial projects, this sequence works well:
| Step | What to check |
|---|---|
| Site review | Floor condition, traffic pattern, sightlines |
| Position test | Main viewing angle and approach path |
| Support setup | Base stability or mounting hardware alignment |
| Final clean | Surface wipe-down, edge check, print inspection |
| Staff handoff | Basic handling and storage instructions |
The best install is the one people don’t notice. The display just looks like it belongs there.
Deciding Between Professional Fabrication and DIY
DIY has a place. It’s just a smaller place than search results suggest.
If you need one simple cutout for a short internal event and appearance matters less than speed, in-house production can be acceptable. That’s especially true when the display won’t travel, won’t be closely inspected, and won’t represent a polished customer-facing brand moment.
Commercial use changes the threshold fast.
Where DIY starts to break down
Manual cutting looks easy until the shape gets complex.
On foam core, consumer-grade box cutters can produce 20 to 30 percent edge imperfection rates, while professional CNC routers achieve less than 5 percent, according to this discussion of cutout production quality in a commercial cutout analysis. That difference matters for retail displays, trade show graphics, and any standee where customers will stand close to the edge profile.
Uneven trimming is only one issue. DIY projects also struggle with:
- Consistent shape reproduction across multiple units
- Stable bases for freestanding use
- Clean color output that matches other branded materials
- Packaging and transport without crushing corners or warping the board
A good rule for business buyers
If the cutout is customer-facing, repeated, or part of a rollout, professional fabrication is usually the safer decision.
That doesn’t mean every project needs the highest-end substrate or the most elaborate finishing. It means the job should be built with the standards of signage, not party decor.
A lot of online content encourages people to improvise with scissors, glue, and hand-trimmed templates. For event planners working on casual celebrations, resources like these DIY photo booth backdrop ideas can be helpful. They’re just solving a different problem than a retail chain, church campus, or trade show exhibitor is solving.
A straightforward decision framework
Use DIY if the answer to most of these is yes:
- Is it a one-off piece?
- Will it be used briefly indoors?
- Is minor edge roughness acceptable?
- Will the audience treat it casually rather than as a brand asset?
Use professional fabrication if these sound more familiar:
| Situation | Better path |
|---|---|
| Multi-location rollout | Professional |
| Lobby or showroom display | Professional |
| Trade show booth feature | Professional |
| Temporary internal celebration | DIY can work |
| Small informal photo prop | DIY can work |
Professional fabrication isn’t just about nicer tools. It’s about getting a repeatable result that protects the brand in public.
What ROI really means here
For cutouts, ROI isn’t only about initial price.
It’s about whether the display lasts the intended campaign, arrives ready to use, stands correctly, and still looks presentable under real lighting and real traffic. If a DIY unit has to be remade, patched, reprinted, or hidden after one event, the apparent savings disappear quickly.
Final Considerations and Frequently Asked Questions
By the time buyers are ready to order, the big decisions are usually settled. The remaining questions are practical.
Most of them come down to three things. Will the cutout hold up in the intended environment? Will it arrive and install without trouble? Will the finished piece look consistent with the rest of the brand?
One material point deserves special attention. Sign supplier data cited in this material sourcing discussion notes that cheap cardboard has a 40 percent failure rate in humid climates, while corrugated plastic shows a 95 percent longevity rate in comparison, which is a major distinction for businesses evaluating durability across locations: material sourcing for durable cutouts
Quick pre-order checklist
Before approving a cut out poster board project, confirm these items:
- Use environment: Indoor, outdoor, or mixed handling conditions
- Expected lifespan: One event, one campaign, or repeated deployment
- Image readiness: Adequate file quality for final size
- Support plan: Freestanding, wall mounted, or suspended
- Shipping approach: Flat pack, crated, or protected bulk shipment
- Storage plan: Dry, flat, and protected between uses
Frequently asked questions
How long does a custom cutout order usually take
Lead time depends on art readiness, material choice, quantity, and finishing complexity.
The biggest avoidable delay is incomplete files. Buyers lose time when the source image is too small, the cut path is unclear, or the support method hasn’t been decided. Clean approvals speed everything up.
How are large cutouts shipped safely
Most rigid cutouts ship flat with protective packaging sized to the board and the shape.
Fragile projections need special attention. Tall or irregular silhouettes may require more protective packing than a simpler profile. If the display is headed to multiple locations, consistency in packing matters as much as the print itself.
What’s the best way to store a cutout between uses
Keep it dry, flat, and out of high-heat areas.
Don’t lean lightweight boards against a wall for long periods if the piece is tall. That encourages bowing. Remove or protect detachable bases and keep edges from rubbing against other hardware.
Can one design work for both indoor and outdoor use
Sometimes, but the material usually has to change.
A graphic concept can often transfer across settings. The substrate and support method may not. Exterior use asks more from the board, the print surface, and the install method.
What’s the biggest ordering mistake buyers make
They focus on the front graphic and ignore the physical realities.
The display has to stand, travel, resist handling, and fit the space. When buyers account for those conditions early, the project goes smoothly. When they don’t, even good artwork can underdeliver.
The practical takeaway
A successful cutout is a fit problem, not just a print problem.
Choose the material for the environment. Build the file for the final size. Simplify the shape where durability matters. Match the support to the site. If the piece represents the brand in public, treat it like signage from the start.
If you need a commercial-grade cutout display that’s built for real-world use, On Display Signs, Inc. can help with design coordination, fabrication, permitting, installation, and multi-site rollout support across the United States.
